How to Build a DIY Outdoor Patio Area
Are you dreaming of creating your own outdoor sanctuary right in your backyard? Building a DIY outdoor patio area can be a rewarding project that adds both beauty and functionality to your outdoor space without breaking the bank. By following these step-by-step instructions and tips, you can turn your vision into reality and enjoy a cozy retreat just steps away from your home.

Planning Your Outdoor Patio
When it comes to planning your outdoor patio, there are several key factors to consider in order to create a space that meets your needs and enhances your outdoor living experience. One of the first things to think about is the size of the patio you want to build. Consider how you will use the space, whether it's for dining, lounging, or entertaining guests, and ensure that the size of the patio can accommodate your activities comfortably.
Another important consideration is the location of your patio. Think about factors such as sunlight exposure, privacy, and proximity to the house. You'll want to choose a spot that gets the right amount of sun and shade throughout the day and is easily accessible from your home.
When it comes to materials, there are various options to choose from for your patio surface. Pavers are a popular choice due to their durability and versatility. Consider the style of your home and outdoor space when selecting the pavers to ensure they complement the overall aesthetic.
Before starting construction, check if any permits are required for building a patio in your area. It's essential to comply with local regulations to avoid any issues down the line. Once you have a clear plan in place, you can proceed with gathering the necessary materials and tools to bring your outdoor patio vision to life.

Gathering Materials and Tools
When it comes to embarking on the journey of building your very own outdoor patio, gathering the necessary materials and tools is a crucial first step. To ensure a smooth and successful DIY project, it's essential to have all the required items at hand before starting the construction process.
One of the primary materials you will need for constructing your patio is pavers. These come in various shapes, sizes, and materials, such as concrete, brick, or stone. The choice of pavers will significantly impact the overall look and durability of your patio, so it's important to select ones that align with your style preferences and budget.
Additionally, gravel and sand are essential components for creating a stable base for your patio. Gravel provides drainage and support, while sand helps in leveling the surface before laying the pavers. Having the right amount of both materials is crucial for the structural integrity of your patio.
Another indispensable tool for your DIY patio project is a level. This tool ensures that the surface of your patio is even and flat, preventing any unevenness that could lead to water pooling or paver misalignment. A level is essential for achieving a professional-looking finish.
Furthermore, a compactor is a must-have tool for compacting the gravel and sand base of your patio. Proper compaction is vital for preventing settling and ensuring the stability of the patio surface over time. Using a compactor will help create a solid foundation for your outdoor oasis.
By gathering these materials and tools beforehand, you set yourself up for a successful patio construction project. Ensuring you have everything you need will streamline the building process and contribute to the long-term durability and beauty of your outdoor space.

Choosing the Right Pavers
When it comes to for your DIY outdoor patio project, there are several factors to consider to ensure you make the best decision for your space. Pavers come in a variety of materials, sizes, shapes, and colors, so it's essential to select ones that not only complement your design aesthetic but also provide durability and functionality.
One of the first things to consider when selecting pavers is the material. Common paver materials include concrete, brick, natural stone, and porcelain. Concrete pavers are versatile and cost-effective, while brick pavers offer a classic look. Natural stone pavers provide a more rustic appearance, and porcelain pavers are known for their durability and low maintenance.
Another crucial factor to keep in mind is the size and shape of the pavers. The size of the pavers can impact the overall look of your patio, with larger pavers creating a more modern feel and smaller pavers offering a traditional look. Additionally, consider the shape of the pavers, whether rectangular, square, or irregular, to determine the pattern and style you want to achieve.
When it comes to color and texture, choose pavers that complement the exterior of your home and blend well with your outdoor surroundings. Earthy tones like beige, gray, and brown are popular choices that can create a cohesive and inviting outdoor space. Textured pavers can add visual interest and provide traction, especially in areas prone to moisture or rain.
Lastly, consider your budget when selecting pavers for your patio. While some materials may be more expensive upfront, they could offer long-term cost savings due to their durability and low maintenance requirements. Evaluate the overall cost of the pavers, including installation and any additional materials needed, to ensure they fit within your budget constraints.

Preparing the Patio Site
When it comes to preparing the site for your outdoor patio, there are several crucial steps to consider before diving into the construction process. One of the first things you need to do is to assess the area where you plan to build your patio. This involves checking the slope of the land, as proper drainage is essential to prevent water from pooling on your patio surface. Additionally, you'll need to mark the boundaries of your patio to ensure that the layout fits your desired space and complements your outdoor area.
Excavation is a key part of preparing the patio site, as you'll need to remove any existing grass, plants, or debris to create a level surface for your patio base. This process may require digging down to a certain depth depending on the type of patio you're building and the materials you'll be using. Proper grading is also important during excavation to ensure that water flows away from your patio and prevents any potential flooding issues.
After excavation, it's crucial to compact the soil to create a stable foundation for your patio. Using a compactor, you can compress the soil to prevent settling and ensure that your patio remains level over time. This step is essential for preventing any uneven areas or shifting of the patio surface once it's completed.
Another important aspect of preparing the patio site is considering any additional features you may want to incorporate, such as drainage systems or lighting. Planning for these elements during the preparation stage can save you time and effort later on, ensuring that your patio not only looks great but also functions effectively for your outdoor activities.

Installing the Patio Base
When it comes to installing the patio base for your DIY outdoor oasis, it's crucial to lay a solid foundation that will support your patio for years to come. The base serves as the backbone of your patio, providing stability and preventing shifting or sinking of the pavers over time. By following the right steps and using the proper materials, you can ensure a durable and long-lasting patio space.
One key element in installing the patio base is the use of gravel, sand, and a compactor. These materials work together to create a stable surface that can withstand the weight of foot traffic and outdoor furniture. The gravel provides drainage to prevent water buildup, while the sand allows for proper leveling of the pavers. Using a compactor ensures that the base is tightly packed and will not shift over time.
Before laying the gravel and sand, it's important to properly prepare the patio site by excavating the area to the appropriate depth. This will allow room for the base materials and ensure that the patio is level with the surrounding landscape. Proper grading of the site is also essential to prevent water from pooling on the patio surface, which can lead to erosion and other issues.
Once the site is prepared, the next step is to evenly distribute the gravel and sand layers, making sure to compact each layer thoroughly. The compactor should be used in multiple passes to achieve the desired level of compaction, which will provide a solid base for the pavers. Taking the time to properly install the patio base will result in a smooth and level surface that is ready for the final step of laying the pavers.
Remember, the quality of your patio base will directly impact the overall longevity and appearance of your outdoor patio area. By following these steps and using the right materials, you can create a patio that not only looks beautiful but also stands the test of time.

Laying the Pavers
When it comes to laying the pavers for your DIY outdoor patio, attention to detail is key to achieving a professional and polished look. Start by ensuring that the base you have prepared is compacted and level, providing a solid foundation for the pavers to rest on. This step is crucial in preventing any shifting or unevenness in the future.
Before laying the pavers, take the time to plan out the pattern you want to create. Whether it's a classic herringbone design or a simple running bond, having a clear vision will make the installation process smoother. Consider using a string or chalk lines to guide you in maintaining straight lines and proper spacing between the pavers.
As you begin placing the pavers, be mindful of any cutting that may be required to fit them into the designated space. A wet saw can be used to make precise cuts, ensuring a seamless fit and professional finish. Take your time during this step to avoid any unnecessary mistakes that could affect the overall look of your patio.
Once all the pavers are in place, use a compactor to firmly press them into the base material. This will help to secure the pavers in position and create a stable surface for walking and entertaining. Be sure to fill any gaps between the pavers with sand or polymeric sand to lock them in place and prevent shifting over time.
After completing the installation, step back and admire your handiwork. The satisfaction of seeing a beautifully laid patio come together is truly rewarding. Remember, attention to detail and patience are key in achieving a stunning outdoor space that you can enjoy for years to come.

Adding Finishing Touches
When it comes to adding finishing touches to your outdoor patio, the possibilities are endless. This is where you can truly make your space unique and inviting. One popular option is to add edging around the patio area to define the space and create a clean, polished look. Edging can be made of various materials such as brick, stone, or even metal, depending on the style you want to achieve.
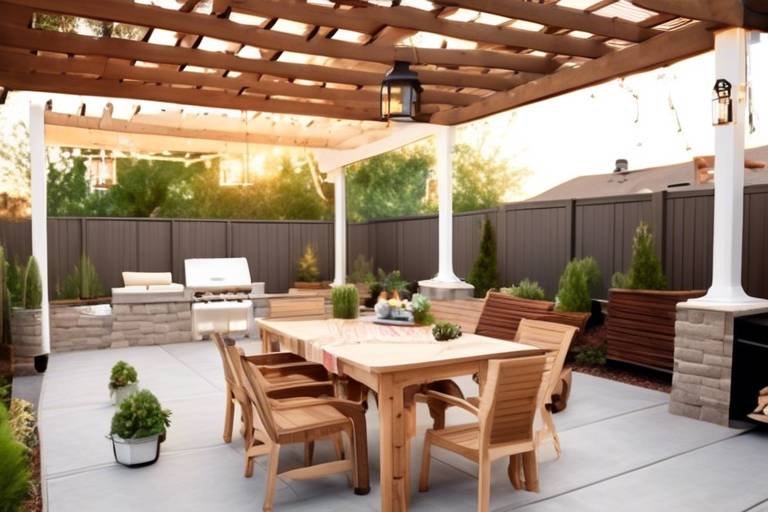
Another important aspect of finishing touches is seating. Whether you choose to include a simple bench, a set of chairs, or even a cozy outdoor sofa, providing comfortable seating options will encourage you and your guests to spend more time enjoying the patio. Consider the layout of your space and how you envision using it to determine the best seating arrangement.
Lighting is key to creating ambiance in your outdoor oasis. Adding string lights, lanterns, or even built-in lighting fixtures can extend the usability of your patio into the evening hours. Lighting not only enhances the atmosphere but also adds a layer of safety and security to your outdoor space.
Greenery is the final touch that can truly bring your patio to life. Incorporating plants, flowers, and even small trees can add color, texture, and a sense of tranquility to the area. Consider using planters, hanging baskets, or creating a garden bed along the edges of the patio to introduce nature into your outdoor retreat.

Maintaining Your Patio
Maintaining your DIY patio is essential to ensure its longevity and keep it looking pristine for years to come. Regular maintenance not only enhances the appearance of your outdoor space but also helps prevent costly repairs in the future. Here are some key tips to help you effectively maintain your patio:
Cleaning: Regularly sweep or hose down your patio to remove debris, leaves, and dirt. For tougher stains, use a mild detergent or specialized cleaner suitable for your pavers. Avoid harsh chemicals that can damage the surface of the pavers.
Sealing the Pavers: Consider applying a sealer to your pavers to protect them from stains, fading, and water damage. Sealing can also enhance the color of the pavers and make them easier to clean. Follow the manufacturer's instructions for the proper application of the sealer.
Addressing Repairs: Inspect your patio regularly for any signs of damage, such as cracked or loose pavers. Promptly replace or repair any damaged pavers to maintain the structural integrity of the patio. It's important to address repairs quickly to prevent further damage.
Weeding: Keep an eye out for weeds growing between the pavers and remove them promptly. Weeds not only detract from the appearance of your patio but can also cause damage by displacing the pavers over time. Consider using a weed killer or natural weed control methods to prevent weed growth.
Seasonal Maintenance: In colder climates, prepare your patio for winter by removing any furniture, planters, or decorations that could be damaged by frost. Consider using a cover to protect your patio during the winter months. In warmer climates, regular maintenance is still necessary to keep your patio in top condition.
By following these maintenance tips, you can ensure that your DIY patio remains a beautiful and functional outdoor space for years to come. With proper care and attention, your patio can continue to be a relaxing retreat for you and your family to enjoy.
Frequently Asked Questions
- What are the key factors to consider when planning an outdoor patio?
When planning an outdoor patio, it is essential to consider factors such as the size of the space, the location in your yard, the materials to be used, and any necessary permits required by local regulations.
- What materials and tools are typically needed for building a DIY patio?
Common materials and tools needed for constructing a DIY patio include pavers, gravel, sand, a level, a compactor, edging materials, seating options, lighting fixtures, and greenery for landscaping.
- How do I choose the right type of pavers for my patio?
Choosing the right pavers for your patio involves considering factors such as durability, style, budget, and maintenance requirements. It is important to select pavers that complement the overall design and function of your outdoor space.
- What is the process for maintaining a DIY patio?
Maintaining a DIY patio involves regular cleaning to remove debris and dirt, sealing the pavers to protect them from weathering, and addressing any necessary repairs to ensure the longevity and appearance of the patio.


