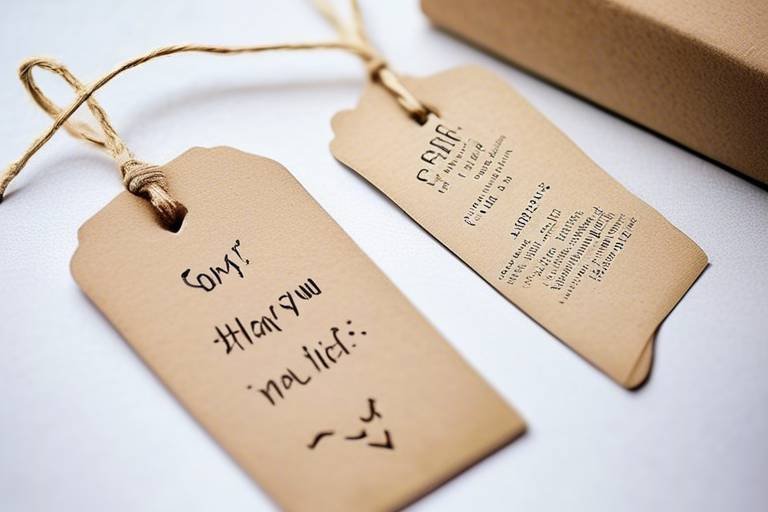
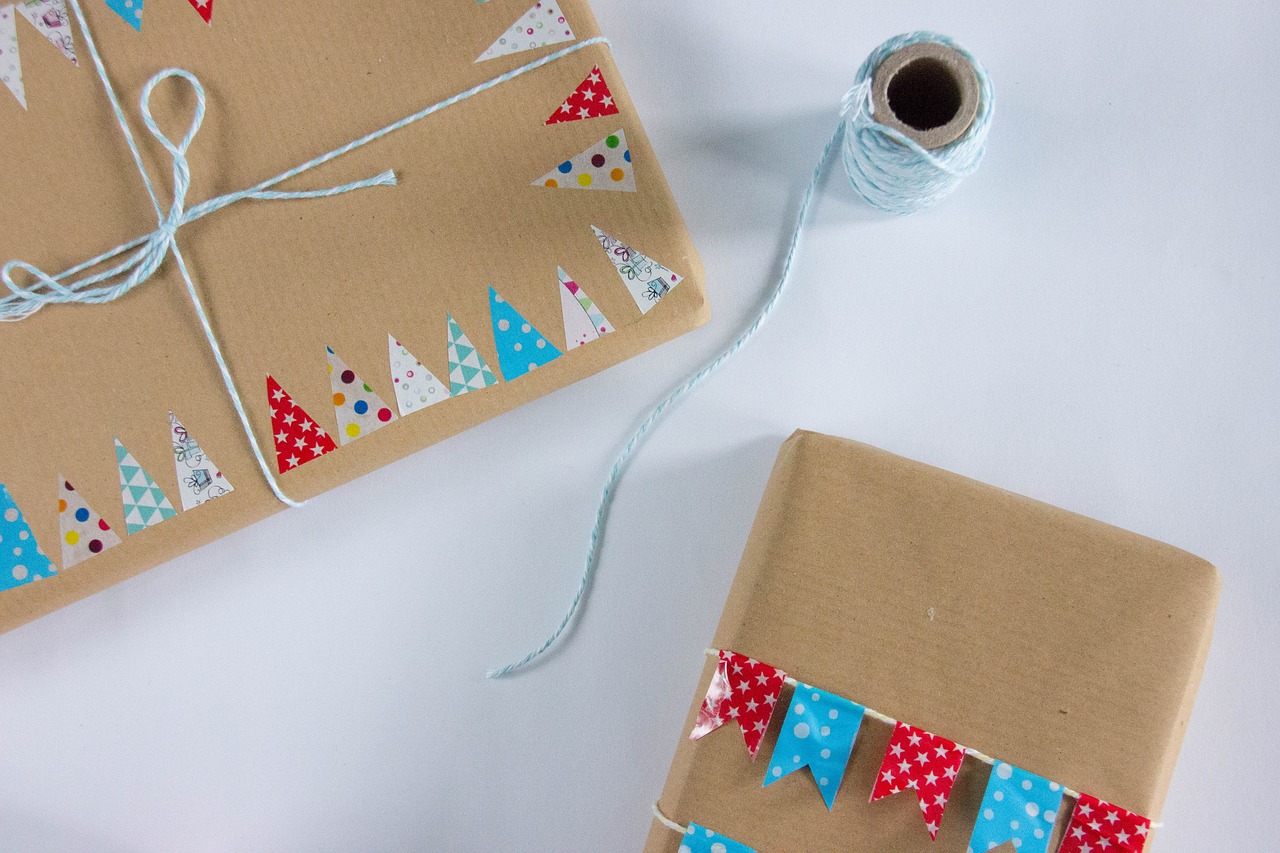
How to Make Your Own Custom Gift Tags
Are you tired of using generic gift tags that lack personalization and creativity? Why not add a special touch to your gifts by creating your own custom gift tags? It's a fun and simple way to show your thoughtfulness and make your gifts stand out. Let's dive into the exciting world of DIY gift tag creation!
First things first, gather all the materials you'll need for this creative project. Grab some paper or cardstock, scissors for cutting, a hole punch for threading ribbons, colorful markers for decorating, and any other decorative items that spark your imagination. The possibilities are endless!
Now comes the fun part - choosing a design theme for your custom gift tags. Whether you're going for a festive holiday look, a charming floral theme, a sleek minimalist style, or vibrant colorful patterns, the choice is yours. Let your creativity run wild and pick a design that resonates with the occasion or the recipient.
If you're not confident in your drawing skills, don't worry! You can explore online design templates to kickstart your creativity. Platforms like Canva or Adobe Illustrator offer a plethora of pre-made templates that you can customize to suit your preferences. Alternatively, unleash your inner artist and create your own unique design templates from scratch.
Once you've settled on a design, grab those scissors and start cutting out the tags in your desired shape and size. Whether you prefer classic rectangles, elegant ovals, or quirky shapes, make sure to cut them neatly for a professional finish. Precision is key in creating eye-catching gift tags!
To add a personal touch to your custom gift tags, consider writing heartfelt messages, doodling charming designs, or embellishing with stickers and other decorations. This is where you can truly showcase your creativity and make each tag unique and special. Your gifts will surely make a lasting impression!
Now, it's time to attach ribbons or strings to your gift tags for easy and stylish attachment to presents. Use a hole punch to create a hole at the top of each tag and thread a ribbon or string through it. This not only adds a decorative element but also makes it convenient for tying the tag to your gifts.
For those who want to take their gift tags to the next level, experiment with stamps or stencils to create intricate designs or patterns. This technique can elevate the look of your tags and give them a polished and professional appearance. Let your creativity shine through these artistic additions!
If you're a fan of all things glittery and sparkly, why not embellish your gift tags with glitter, sequins, or sparkly markers? Adding a touch of sparkle can make your tags stand out and add a touch of magic to your gifts. It's a simple yet effective way to make a statement!
When it comes to labeling techniques, the sky's the limit. Explore different options such as elegant calligraphy, fun letter stickers, or printed labels to add names, messages, or even quotes to your gift tags. Each labeling technique adds a unique charm to your tags and enhances the overall presentation of your gifts.

Gather Your Materials
When embarking on the creative journey of making your own custom gift tags, it's essential to gather all the necessary materials beforehand. The key to a successful DIY project lies in having everything you need at your fingertips. So, what do you need in your arsenal to craft these unique tags that will elevate your gift-giving game?
First and foremost, you'll need high-quality paper or cardstock to serve as the base for your gift tags. Opt for different colors and textures to add variety and visual appeal to your creations. Scissors are a must-have tool for cutting out the desired shapes and sizes of your tags, giving them a professional finish.
Don't forget to grab a hole punch to create a neat opening for ribbons or strings to pass through. Ribbons and strings are essential for attaching the tags to your gifts elegantly. Choose a variety of colors and materials to complement the overall look of your tags.
Markers in an array of colors will come in handy for adding personalized messages, drawing designs, or embellishing your tags with creative flair. Additionally, consider collecting stickers, stamps, and other decorative items to further enhance the visual appeal of your gift tags.
By having these materials ready and organized, you'll set yourself up for a smooth and enjoyable crafting experience. Remember, the magic happens when you let your creativity flow and infuse each tag with a touch of your unique style.

Choose a Design Theme
When it comes to creating your own custom gift tags, one of the most exciting steps is choosing a design theme that reflects the occasion or the recipient's personality. Your design theme sets the tone for the entire gift-giving experience, adding a unique touch that shows you've put thought and effort into the details.
Imagine the joy on someone's face when they receive a gift adorned with a beautifully crafted gift tag that perfectly complements the present inside. Whether you opt for a holiday-themed design to spread festive cheer or a minimalist approach for a modern aesthetic, the possibilities are endless.
To begin, consider the recipient's preferences and the overall vibe you want to convey. Are you celebrating a special occasion like a birthday or anniversary? Or perhaps you're looking to add a touch of elegance with floral patterns or vibrant colors. By choosing a design theme that resonates with the occasion, you can create a cohesive look that ties everything together.

Design Templates
When it comes to creating personalized gift tags, having can be a game-changer. Design templates serve as a foundation for your creativity, providing a structured starting point for your custom gift tags. Whether you opt for pre-made templates from online sources or decide to craft your own using design software like Canva or Adobe Illustrator, the possibilities are endless.

Cut Out the Tags
When it comes to creating custom gift tags, one of the essential steps is cutting out the tags to the desired shape and size. This process allows you to personalize the tags according to your preferences and the theme of the occasion. Whether you opt for a classic rectangular shape or a more intricate design, cutting out the tags is where your creativity truly comes to life.
To begin, select the paper or cardstock that best suits your design theme and preferences. Consider the color, thickness, and texture of the material to ensure that it complements the overall look of your gift tags. Once you have chosen the perfect paper, use a pair of sharp scissors to carefully cut out the tags in the shape and size you desire. Precision is key in this step to achieve clean and professional-looking edges.
If you prefer a more uniform and polished appearance, you can create a template to trace onto the paper before cutting. This ensures consistency in the shape and size of each tag, making your final product appear cohesive and well-crafted. Templates can be easily made using basic drawing tools or software applications for more intricate designs.
As you cut out each tag, take your time to ensure accuracy and attention to detail. Smooth, even edges enhance the overall aesthetics of the gift tags and contribute to a more refined final result. Remember, the cutting process is where your vision for the design truly takes shape, so embrace the opportunity to bring your creative ideas to fruition.
Add Personal Touches
When it comes to adding personal touches to your custom gift tags, the possibilities are endless. You can let your creativity shine by incorporating unique elements that reflect the recipient's personality or the occasion you are celebrating. Whether it's a heartfelt message, a hand-drawn design, or a special embellishment, adding personal touches to your gift tags can make them truly one-of-a-kind.
One way to personalize your gift tags is by incorporating the recipient's favorite colors, patterns, or themes. Consider using their favorite color as the background for the tag or incorporating elements that represent their hobbies or interests. This thoughtful gesture can show the recipient that you put extra care and thought into their gift.
Another way to add a personal touch is by hand-lettering a meaningful quote, the recipient's name, or a short message on the tag. This not only adds a personal element to the gift but also showcases your artistic skills and attention to detail. You can use different fonts, colors, and styles to make the text stand out and complement the overall design of the tag.
If you're feeling crafty, consider adding small embellishments such as buttons, beads, or charms to your gift tags. These little additions can add texture, dimension, and a touch of whimsy to your tags, making them visually appealing and unique. Just be sure to secure the embellishments properly so they don't fall off during handling.
For a more rustic or natural look, you can incorporate elements from nature into your gift tags. Think dried flowers, leaves, twigs, or even small pinecones for a seasonal touch. These organic materials not only add a charming aesthetic to the tags but also bring a sense of the outdoors to your gift-giving experience.
Remember, the key to adding personal touches to your custom gift tags is to let your imagination run wild. Don't be afraid to experiment with different techniques, materials, and styles to create tags that truly reflect your creativity and thoughtfulness. Whether you're making gift tags for a birthday, wedding, holiday, or any other special occasion, adding personal touches can elevate your gift-giving experience to a whole new level.
Attach Ribbons or Strings
When it comes to adding that final touch to your custom gift tags, attaching ribbons or strings can elevate the presentation to a whole new level. By punching a hole at the top of each gift tag and threading a ribbon or string through it, you not only ensure easy attachment to gifts but also create a visually appealing element that enhances the overall look.
Imagine the excitement on the recipient's face when they see a beautifully crafted gift tag adorned with a delicate ribbon or a colorful string. It's like adding a bow to a present - it just makes everything more special and inviting. The tactile experience of feeling the ribbon or string adds another dimension to the gift-giving process, making it a memorable moment for both the giver and the receiver.
To make the process even more engaging, you can experiment with different types of ribbons or strings. Whether you opt for a classic satin ribbon, a rustic twine, or a vibrant colored string, each choice can complement the theme of your gift and reflect your personal style. The versatility of ribbons and strings allows you to customize the look of your gift tags according to the occasion, whether it's a festive holiday gift or a heartfelt birthday present.
If you're feeling creative, you can even incorporate multiple ribbons or strings into a single gift tag, creating a layered effect that adds depth and visual interest. Mixing and matching different textures and colors can result in a unique and eye-catching design that sets your gift apart from the rest.
Use Stamps or Stencils
When it comes to adding a touch of creativity and sophistication to your custom gift tags, using stamps or stencils can elevate the overall look and feel of your creations. Stamps offer intricate designs and patterns that can bring a unique flair to your gift tags, while stencils provide a structured and polished finish.
With stamps, you can experiment with various shapes, symbols, and images to complement the theme of your gift. Whether you opt for floral motifs, geometric patterns, or seasonal elements, stamps allow you to easily transfer detailed designs onto your gift tags with precision.
On the other hand, stencils offer a more controlled approach to decorating your gift tags. By using stencils, you can create uniform patterns or borders that add a professional touch to your designs. Stencils also enable you to achieve consistency in your artwork, making each gift tag look cohesive and visually appealing.
To enhance the visual impact of your gift tags, consider combining stamps and stencils for a layered effect. By using stamps to create focal points and stencils for background elements, you can achieve a balanced and harmonious composition that catches the eye.
When selecting stamps or stencils for your custom gift tags, choose designs that complement the overall aesthetic you wish to achieve. Whether you prefer intricate details, bold graphics, or subtle accents, the right stamps and stencils can add depth and dimension to your creations, making them truly one-of-a-kind.

Embellish with Glitter or Sparkles
When it comes to adding a touch of glamour and sparkle to your custom gift tags, there are various ways to embellish them with glitter or sparkles. These shiny elements can elevate the look of your gift tags and make them truly eye-catching. Whether you are creating tags for a birthday, holiday, or special occasion, adding glitter or sparkles can bring a festive and fun vibe to your gifts.
One popular method to embellish gift tags with glitter is by using glitter glue or glitter pens. These tools allow you to easily apply glitter in a precise manner, whether you want to outline a design, add accents, or create a shimmering border. The glitter adds a playful and whimsical touch to your tags, making them stand out and sparkle under the light.
If you prefer a more subtle sparkle, you can opt for sparkly markers or pens that contain fine glitter particles. These markers allow you to write or draw on your gift tags while adding a hint of shimmer to your designs. They are perfect for adding a touch of elegance without overpowering the overall look of the tag.
For a more dramatic effect, consider using loose glitter or sequins to embellish your gift tags. You can apply a thin layer of glue to specific areas of the tag and then sprinkle the glitter or sequins on top. This method creates a dazzling and textured look that is sure to catch the recipient's eye. Just be mindful of the messiness that loose glitter can create!
To ensure that the glitter or sparkles stay in place and do not rub off, you can seal the embellished areas with a clear adhesive spray or a layer of clear nail polish. This will help secure the glitter and prevent it from flaking off, ensuring that your gift tags maintain their sparkle and shine for a long time.
Experimenting with different types of glitter, sparkles, and embellishment techniques can add a personal and creative touch to your custom gift tags. Whether you prefer a subtle shimmer or a bold sparkle, incorporating glitter into your designs can take your gift tags to the next level and make your gifts truly unforgettable.

Labeling Techniques
Labeling techniques play a crucial role in adding a personalized touch to your custom gift tags. One popular method is calligraphy, where you can use elegant handwriting to write names or messages on the tags. This adds a sophisticated and artistic flair to your gift presentation. Additionally, utilizing letter stickers can provide a quick and easy way to add names or short phrases to your tags, perfect for those looking for a neat and professional finish. For a more polished look, printed labels offer a precise and clean way to include detailed information or designs on your gift tags.
Frequently Asked Questions
- Can I use any type of paper for making custom gift tags?
Yes, you can use a variety of papers for creating custom gift tags, including cardstock, patterned paper, recycled paper, or even specialty papers like vellum or textured paper. The choice of paper will depend on the look and feel you want to achieve for your gift tags.
- Do I need special tools to make personalized gift tags?
While having tools like scissors, a hole punch, and markers is helpful, you can also get creative with everyday items like cookie cutters for shaping the tags, yarn or twine for attaching them, and household items for adding unique touches. The key is to personalize your gift tags based on your preferences and available materials.
- How can I make my gift tags more durable?
To make your gift tags more durable, consider laminating them, using thicker paper or cardstock, applying a coat of clear sealant, or reinforcing the edges with washi tape or decorative tape. These methods can help protect your custom gift tags from wear and tear, ensuring they last longer.
- Can I create gift tags for specific events or holidays?
Absolutely! Custom gift tags are perfect for any occasion, whether it's birthdays, weddings, holidays, or everyday gift-giving. You can tailor the design, colors, and messages on the tags to suit the theme of the event or holiday, adding a personal touch to your gifts.