How to Make Your Own Decorative Wall Clock
Are you looking to add a personal touch to your home decor? Creating your own decorative wall clock is a fantastic way to showcase your creativity and style. By following a few simple steps, you can craft a unique timepiece that not only keeps you on schedule but also serves as a stunning focal point in any room.
When it comes to making your own decorative wall clock, the possibilities are endless. You can choose from a wide range of design concepts, materials, and decorative elements to tailor the clock to your taste and home decor. Whether you prefer a sleek modern look or a more whimsical design, there are plenty of options to explore.
One of the first steps in crafting your DIY wall clock is gathering the necessary materials and tools. From clock hands and numbers to the clock mechanism itself, ensuring you have all the essential components is crucial to the success of your project. Setting up a dedicated workspace with all the tools you need will make the crafting process smoother and more enjoyable.
Once you have all your materials ready, it's time to select a design concept for your decorative wall clock. Whether you're drawn to minimalist styles, vintage charm, or nature-inspired motifs, choosing a design that resonates with you is key. Consider the existing aesthetic of the room where the clock will be displayed and select a design that complements the space.
Customizing the clock face is where you can truly let your creativity shine. Experiment with different painting techniques, decoupage, or stenciling to create a one-of-a-kind design that reflects your personality. Adding colors, patterns, or images that speak to you will ensure your wall clock is a unique and eye-catching piece of decor.
Assembling the clock mechanism may seem daunting, but with step-by-step instructions, you can easily install the hands, numbers, and mechanism onto the clock face. Proper alignment and secure attachment of all components are essential for the clock to function correctly and keep accurate time.
Adding decorative elements such as beads, gems, feathers, or charms can elevate the visual appeal of your wall clock. Experimenting with textures and shapes will help you create a piece that stands out and adds a personal touch to your decor. Don't be afraid to get creative and make your clock truly one-of-a-kind.
Once your decorative wall clock is assembled, it's time to install hanging hardware for easy mounting. Choosing the right hardware based on the weight and size of your clock is crucial to ensure it hangs securely on the wall. Proper installation will allow you to showcase your handmade timepiece with confidence.
After completing your DIY wall clock, don't forget to test the mechanism to ensure it keeps accurate time. Making any necessary adjustments to the hands or mechanism will guarantee proper functionality. Once everything is in working order, find the perfect spot in your home to display your custom decorative wall clock and enjoy the satisfaction of creating a beautiful and functional piece of decor.
Creating your own decorative wall clock is a rewarding and enjoyable project that allows you to express your individual style and creativity. Whether you're a seasoned crafter or a beginner looking to try something new, crafting a personalized timepiece is a fun and unique way to enhance your home decor.

Gather Materials and Tools
When embarking on the journey of creating your own decorative wall clock, the first step is to gather all the necessary materials and tools for the project. To bring your unique timepiece to life, you will need a variety of items to ensure a successful crafting process. Essential materials include clock hands, numbers, a clock mechanism, and decorative elements to add a personal touch to your creation. Additionally, having tools such as a screwdriver, glue, paintbrushes, and scissors on hand will make the crafting process smoother and more efficient.

Select a Design Concept
When it comes to creating your own decorative wall clock, selecting a design concept is a crucial step in the process. Your chosen design will set the tone for the entire piece and determine its overall aesthetic appeal. Whether you prefer a minimalist look, a vintage feel, a modern style, or a nature-themed design, the possibilities are endless. Consider the existing decor of the room where the clock will be displayed and choose a concept that complements the space harmoniously.

Customize Clock Face
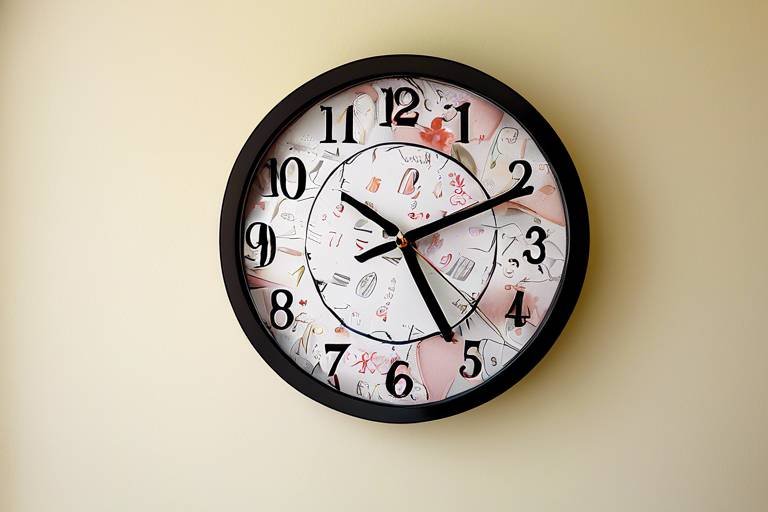
When it comes to creating a unique and personalized decorative wall clock, customizing the clock face is a crucial step in the crafting process. This is where you can truly let your creativity shine and make your timepiece stand out. Whether you prefer vibrant colors, intricate patterns, or meaningful images, the possibilities are endless when it comes to customizing the face of your clock.
One popular way to customize the clock face is through painting. You can use acrylic paints, watercolors, or even spray paint to create a design that suits your style. Experiment with different brush strokes, color combinations, and textures to achieve the desired look. If you're feeling adventurous, you can also try techniques like splatter painting or marbling for a more unique finish.
Another creative option is decoupage, which involves adhering paper cutouts or fabric onto the clock face. This technique allows you to incorporate intricate designs, vintage patterns, or even personal photos onto the clock. By layering and sealing the materials with decoupage glue, you can achieve a seamless and professional-looking finish.
For those who prefer precision and detail, stenciling is a great way to customize the clock face with intricate designs and shapes. You can use pre-made stencils or create your own using stencil film or cardstock. Simply secure the stencil onto the clock face and apply paint using a stencil brush to transfer the design onto the surface.
Additionally, you can explore the option of adding embellishments such as decorative beads, gems, or charms to enhance the visual appeal of the clock face. These small details can add a touch of elegance and personality to your timepiece. Consider mixing and matching different elements to create a unique and eye-catching design that reflects your personal taste.

Assemble the Clock Mechanism
When it comes to creating your own decorative wall clock, assembling the clock mechanism is a crucial step in ensuring that your timepiece functions accurately and reliably. This process involves carefully installing the clock hands, numbers, and mechanism onto the clock face in the correct alignment.
First, start by laying out all the components of the clock mechanism, including the clock hands, numbers, and any additional pieces that may come with the kit. Ensure that you have a clear understanding of how each part fits together before proceeding.
Next, refer to the instructions provided with the clock mechanism kit to guide you through the assembly process. Typically, you will need to attach the hour and minute hands onto the clock mechanism, followed by securing the numbers in their designated positions on the clock face.
It is essential to pay close attention to the alignment of the clock hands to ensure that they move smoothly and do not interfere with each other. Take your time during this step to avoid any potential issues with the functionality of the clock.
Once the hands and numbers are securely in place, attach the clock mechanism to the back of the clock face according to the manufacturer's instructions. Make sure that all components are firmly attached to prevent any wobbling or misalignment.
After assembling the clock mechanism, give it a test run to see if the hands move correctly and keep accurate time. If adjustments are needed, carefully realign the hands or tighten any loose components to ensure the clock functions properly.
By following these steps and taking your time to assemble the clock mechanism correctly, you can create a personalized wall clock that not only looks stylish but also serves its primary function of keeping time accurately.

Add Decorative Elements
When it comes to adding decorative elements to your DIY wall clock, the possibilities are endless. You can unleash your creativity and infuse your personal style into the design. Consider incorporating beads, gems, feathers, or charms to enhance the visual appeal of your timepiece. These elements can add a touch of elegance, whimsy, or sophistication, depending on your preference.
Experimenting with textures and shapes can also elevate the overall look of your wall clock. Mixing and matching different materials can create a unique and eye-catching piece that becomes a focal point in your home decor. Whether you prefer a more subtle and understated design or a bold and vibrant statement piece, adding decorative elements allows you to tailor the clock to your taste.
One creative idea is to create a themed clock by using elements that reflect a specific interest or passion. For example, if you love nature, you could incorporate natural elements like dried flowers, leaves, or small branches into the design. This not only adds a personal touch but also brings a sense of the outdoors into your living space.
Additionally, consider the placement of the decorative elements on the clock face. Arranging them strategically can create a balanced and visually appealing composition. You can play with symmetry, asymmetry, or patterns to achieve the desired aesthetic. Remember, the goal is to make your wall clock a reflection of your style and personality.

Install Hanging Hardware
When it comes to installing hanging hardware for your decorative wall clock, it's essential to choose the right tools and techniques to ensure a secure and stable mount. The hardware you select should be sturdy enough to support the weight of the clock and durable to withstand daily use. Additionally, the placement of the hardware on the back of the clock is crucial for proper balance and alignment when hanging it on the wall.
One common method for installing hanging hardware is to use D-ring hangers or keyhole hangers, which provide a reliable way to hang your clock securely. These hardware options allow for easy adjustment and leveling of the clock once it's on the wall. Make sure to measure and mark the precise placement of the hardware on the back of the clock to ensure it hangs straight and level.
If you prefer a more decorative approach, consider using decorative hooks or brackets that not only serve a functional purpose but also add to the overall aesthetic of your wall clock. These ornamental hardware pieces can complement the design of your clock and enhance its visual appeal when displayed on the wall.
Before attaching the hanging hardware, double-check the weight capacity of the hardware to ensure it can support the size and weight of your clock. It's also advisable to use wall anchors or screws that are suitable for the type of wall surface where you plan to hang the clock. Properly securing the hardware will prevent any accidents or damage to your wall decor.

Test and Adjust
After completing your DIY wall clock, it's time to the mechanism to ensure it functions correctly. Place the clock in its designated spot and set the time according to your preference. Observe the movement of the hands and listen for any unusual sounds that may indicate a problem.
If the clock is not keeping accurate time, you may need to adjust the hands or the mechanism. Carefully remove the clock hands and reposition them to align properly with the numbers on the clock face. Make small adjustments to the clock mechanism if necessary to improve its timekeeping.
It's also essential to check the battery powering the clock to ensure it has enough power to operate efficiently. Replace the battery if needed and test the clock again to see if the timekeeping has improved.
Another aspect to consider during the testing phase is the visibility of the clock hands. Ensure that the hands are distinct and easy to read against the background of the clock face. If necessary, consider changing the color or style of the hands for better visibility.
Once you have made the necessary adjustments, let the clock run for a while to see if it maintains accurate time. Monitor its performance over a few hours or days to ensure that it continues to function properly. By testing and adjusting your DIY wall clock, you can guarantee that it not only looks great but also serves its primary purpose effectively.

Display and Enjoy
Once you have completed crafting your custom decorative wall clock, it's time to find the perfect spot to display and enjoy your creation. Consider placing your unique timepiece in a prominent location where it can be easily seen and admired by both residents and guests. Whether it's in the living room, kitchen, bedroom, or home office, choose a wall that complements the design and style of your clock.
When deciding on the placement, think about the overall aesthetic of the room and how the wall clock can enhance the existing decor. You may want to hang it above a mantelpiece, on a blank wall, or as a centerpiece in a gallery wall arrangement. Experiment with different heights and angles to find the most visually appealing display for your handmade clock.
Consider the lighting in the room as well, as natural light can highlight the details and craftsmanship of your decorative wall clock. Position it in a place where it can catch the light and create interesting shadows, adding depth and dimension to the design. Additionally, make sure the clock is easily visible from various angles for both functional and decorative purposes.
Once you have found the perfect spot, take a step back and admire your handiwork. Revel in the satisfaction of creating a beautiful and functional piece of decor that reflects your personal style and creativity. Your custom decorative wall clock is not just a timekeeping device but also a statement piece that adds personality and charm to your living space.
Frequently Asked Questions
- Can I use any type of materials for making a decorative wall clock?
While you have the freedom to choose materials that suit your style, it's important to consider the durability and weight of the materials. Opt for lightweight and sturdy materials that can support the clock mechanism and enhance the overall aesthetic of the clock.
- Do I need special tools to assemble the clock mechanism?
Basic tools like a screwdriver, pliers, and adhesive are typically all you need to assemble the clock mechanism. Make sure to follow the manufacturer's instructions that come with the clock kit for precise installation.
- How can I ensure my DIY wall clock keeps accurate time?
After assembling the clock mechanism, ensure that the hands are not obstructed and have enough clearance to move freely. Test the clock for a few days to verify its accuracy and make any necessary adjustments to the hands or mechanism as needed.
- What if I want to change the design of my wall clock later on?
If you wish to update the design of your wall clock, you can easily do so by replacing the clock face or decorative elements. Consider seasonal or thematic changes to keep your decor fresh and reflective of your evolving style preferences.