How to Create DIY Personalized Stationery
Are you tired of generic stationery that lacks personality and charm? Do you want to make your correspondence stand out with a personal touch? Creating DIY personalized stationery is the perfect solution for adding a unique flair to your letters, notes, and gifts. In this article, we will guide you through the process of crafting your own customized stationery right from the comfort of your home.
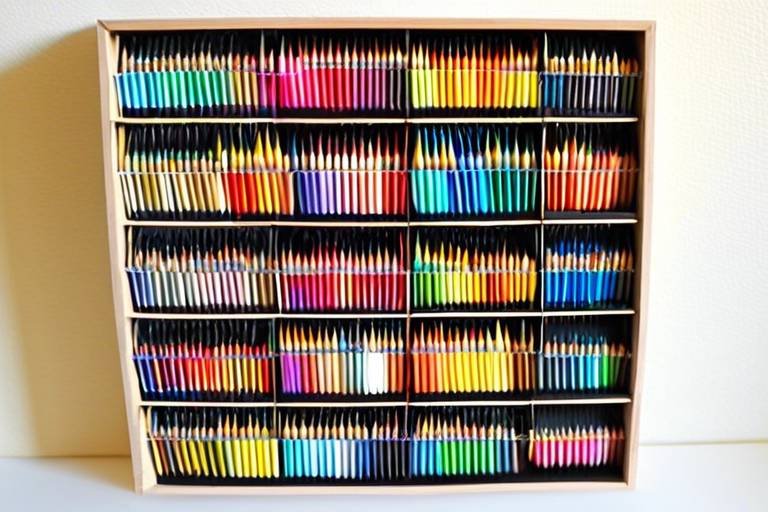
Before diving into the creative process, it's essential to gather all the necessary materials for your personalized stationery project. You will need high-quality paper, envelopes, a selection of pens, stamps for added flair, and various decorative elements to bring your designs to life. Having these supplies on hand will ensure a smooth and enjoyable crafting experience.
When it comes to choosing a design theme for your personalized stationery, the options are endless. Whether you prefer a floral motif for a touch of elegance, a geometric pattern for a modern look, a vintage-inspired design for nostalgia, or a minimalist approach for simplicity, the choice is yours. Selecting a design theme that resonates with your personal style will make your stationery truly one-of-a-kind.
Designing the layout of your stationery is where your creativity can truly shine. Consider the placement of text, images, borders, and other design elements to create a cohesive and visually appealing composition. Experiment with different layouts until you find one that captures the essence of your personal style and aesthetic preferences.
To add a personal touch to your stationery, consider incorporating unique elements such as monograms, custom illustrations, or handwritten quotes. These personalized details will make your stationery feel special and memorable, leaving a lasting impression on recipients.
Embellishing your stationery with details like ribbons, washi tape, stickers, or wax seals can elevate its appearance and make it truly stand out. These embellishments add texture, color, and personality to your designs, turning ordinary stationery into extraordinary creations.
Once you have finalized your designs, it's time to print and assemble your personalized stationery. Whether you choose to print them at home or through a professional service, ensure that the quality of printing meets your standards. Assemble your stationery into sets or packs for easy use and gifting.
Before finalizing your personalized stationery, don't forget to conduct a thorough quality check. Look for any errors in printing, design alignment, or overall presentation to ensure that your stationery meets your expectations. Attention to detail during this stage will result in a polished and professional final product.
Proper storage and presentation of your personalized stationery are crucial for maintaining its quality and appeal. Store your stationery in a dry and protected environment to prevent damage and fading. Consider creative packaging ideas for gifting your stationery to friends and loved ones, adding an extra touch of thoughtfulness to your correspondence.

Gathering Materials
This article provides a step-by-step guide on creating personalized stationery at home, allowing you to add a unique touch to your correspondence and gifts.
When embarking on the journey of creating personalized stationery, it is essential to gather the right materials to bring your vision to life. The key components include high-quality paper that suits your design, envelopes to match, pens with various ink colors for customization, stamps for adding flair, and decorative elements to enhance the overall look. These materials form the foundation of your stationery creation process, ensuring that each piece is crafted with care and attention to detail.

Choosing a Design Theme
When it comes to for your personalized stationery, the options are as vast as your imagination. Your stationery design theme sets the tone for your correspondence and reflects your personality. Whether you prefer a floral motif to add a touch of nature, a geometric pattern for a modern look, a vintage aesthetic for a nostalgic feel, or a minimalist approach for a clean and elegant style, the choice is yours.

Designing Your Layout
When it comes to for personalized stationery, the possibilities are endless. This is where your creativity can truly shine, turning a simple piece of paper into a work of art that reflects your personality and style. Think of your stationery as a canvas waiting to be filled with your unique vision.
One approach to designing your layout is to start with a focal point, whether it's a monogram, a decorative motif, or a striking image. This central element will set the tone for the rest of the design and provide a visual anchor for the recipient's eyes. Consider how you want the recipient to feel when they first lay eyes on your stationery – do you want to evoke a sense of elegance, playfulness, or nostalgia?
Another important aspect of designing your layout is the placement of text. Whether you're including a heartfelt message, a witty quote, or simply your name, the way you position the text can greatly impact the overall look of your stationery. Experiment with different fonts, sizes, and alignments to find the perfect balance.
Borders and frames can also play a significant role in enhancing your layout. They can help define the edges of your design, create visual interest, and tie everything together. Whether you opt for a simple border for a clean look or a decorative frame for a more elaborate style, don't underestimate the power of these elements in elevating your stationery.
Lastly, don't be afraid to play around with colors, patterns, and textures to add depth and dimension to your layout. Consider incorporating complementary hues, subtle patterns, or tactile elements like embossing or foiling for a luxurious touch. Remember, the goal is to create a design that not only looks visually appealing but also feels special to both you and the recipient.

Adding Personal Touches
Adding personal touches to your stationery can elevate its uniqueness and charm, making it truly one-of-a-kind. One creative way to personalize your stationery is by incorporating monograms. Monograms add a touch of elegance and sophistication, giving your stationery a polished look. You can also consider including custom illustrations that reflect your personality or interests. Whether it's a doodle, a sketch, or a detailed drawing, custom illustrations can make your stationery stand out.
If you have a knack for handwritten quotes or phrases, why not add them to your stationery? Handwritten quotes lend a personal and heartfelt touch to your correspondence, making each piece special and meaningful. Additionally, you can experiment with different fonts to add a unique flair to your stationery. From elegant scripts to playful cursive, choosing the right font can enhance the overall look and feel of your design.

Embellishing with Details
When it comes to creating personalized stationery, adding embellishments and details can take your designs to the next level. These small additions can make a big impact on the overall look and feel of your stationery, making it truly unique and special. From delicate ribbons to intricate wax seals, there are countless ways to embellish your stationery and make it stand out.
One popular way to embellish your stationery is by using washi tape. This decorative tape comes in a variety of colors and patterns, allowing you to add a pop of color and design to your cards and envelopes. Whether you use it to create borders, accents, or patterns, washi tape is a versatile and easy-to-use embellishment that can instantly elevate your stationery.
Another elegant touch to consider is adding wax seals to your envelopes. Wax seals not only add a touch of old-world charm to your stationery but also provide a sense of luxury and sophistication. You can choose from a variety of wax seal designs and colors to match your stationery theme and create a memorable impression on the recipient.
For those looking to add a playful element to their stationery, stickers can be a fun and creative embellishment. From floral stickers to metallic accents, stickers offer a quick and easy way to personalize your stationery and add a touch of whimsy. You can mix and match different stickers to create unique designs or use them to highlight specific elements of your stationery.
Lastly, ribbons are a classic embellishment that can instantly add a touch of elegance to your stationery. Whether you tie a ribbon around a stack of notecards or use it to secure an envelope, ribbons can enhance the presentation of your stationery and make it feel more luxurious. Choose ribbons in different colors, widths, and textures to complement your design theme and create a cohesive look.

Printing and Assembling
Printing and assembling your personalized stationery is the final step in bringing your creative vision to life. Whether you choose to print at home or opt for professional printing services, this stage is crucial in ensuring that your stationery looks polished and professional.
When printing at home, make sure to use high-quality paper that is compatible with your printer to achieve the best results. Consider the thickness and texture of the paper to enhance the overall look and feel of your stationery. Additionally, calibrate your printer settings to ensure accurate colors and crisp printing.
If you prefer professional printing services, research local or online printing companies that specialize in stationery printing. Provide them with your design files in the required format and discuss any specific printing preferences you may have, such as paper type or finish.
After printing, it's time to assemble your stationery into sets or packs for easy use. Organize your printed pieces neatly and consider adding a cover sheet or belly band to keep them together. This not only adds a professional touch but also protects your stationery during storage or gifting.
Remember to inspect each printed piece for any imperfections or printing errors before assembling them. Check for color accuracy, alignment of design elements, and overall print quality to ensure that your personalized stationery meets your expectations.
Once assembled, consider packaging your stationery in a creative and visually appealing way. Use decorative boxes, envelopes, or folders to store your stationery sets and add a personal touch with custom labels or stickers. This not only enhances the presentation but also makes your stationery ready for gifting or personal use.

Quality Checking
When it comes to creating personalized stationery, ensuring the quality of your final product is crucial. Quality checking plays a significant role in guaranteeing that your stationery meets your standards and leaves a lasting impression on recipients. Before finalizing your designs, it's essential to meticulously inspect every detail to catch any errors or inconsistencies that may detract from the overall presentation.
One key aspect of quality checking is verifying the accuracy of the printing. Check for any smudges, misprints, or color discrepancies that could affect the clarity and professionalism of your stationery. Ensure that the text is legible and aligned correctly, maintaining a polished look that reflects the care and effort you put into creating your personalized designs.
Additionally, pay attention to the design alignment and layout of your stationery. Make sure that all elements, such as images, borders, and text, are positioned harmoniously on the page. Consistency in spacing and alignment contributes to a visually appealing composition that enhances the overall aesthetic of your stationery.
Another critical aspect of quality checking is reviewing the overall presentation of your stationery. Take a step back and assess the design as a whole, considering how all the elements come together to convey your intended message or style. Look for any areas that may appear cluttered or unbalanced, making necessary adjustments to achieve a cohesive and polished look.
Furthermore, don't forget to proofread the content of your stationery thoroughly. Check for spelling errors, grammatical mistakes, or inaccuracies in the text that could undermine the professionalism of your designs. A meticulous review of the written content ensures that your stationery communicates your message clearly and effectively.
Lastly, seek feedback from others to gain different perspectives on your personalized stationery. Show your designs to friends, family, or colleagues and ask for their honest opinions and suggestions for improvement. Constructive feedback can help you identify areas for enhancement and refine your stationery to achieve the desired impact on recipients.

Storage and Presentation
When it comes to storing your personalized stationery, it's essential to keep it in a safe and organized manner to preserve its quality and presentation. One way to store your stationery is by using clear plastic sleeves to protect it from dust and moisture while still allowing you to admire the designs. These sleeves also make it easy to flip through your collection and select the perfect piece for any occasion.
If you prefer a more elegant and stylish storage solution, consider investing in a decorative box or a stationery organizer. These options not only keep your stationery protected but also add a touch of sophistication to your workspace or desk. You can find a variety of designs and sizes to suit your personal style and storage needs.
For those who enjoy DIY projects and want to add a personal touch to their stationery storage, you can create your own stationery portfolio using sturdy cardstock or fabric. By customizing the size and design of the portfolio, you can tailor it to fit your stationery sets perfectly and showcase them in a unique way.
When it comes to presenting your personalized stationery as a gift, the packaging plays a crucial role in creating a memorable experience for the recipient. Consider decorative gift boxes or paper bags adorned with ribbons and bows to add an element of surprise and delight. You can also include a personalized note or gift tag to make the presentation even more special.
Another creative way to present your personalized stationery is by creating gift sets that include matching envelopes, stamps, and other stationery accessories. By bundling these items together in a coordinated package, you can offer a complete stationery experience to the recipient, making it a thoughtful and practical gift.
Remember, the way you store and present your personalized stationery reflects your attention to detail and creativity, so take the time to choose storage options and presentation styles that align with your personal aesthetic and the impression you want to convey.
Frequently Asked Questions
- Can I create personalized stationery without any design experience?
Absolutely! Creating personalized stationery is a fun and creative process that anyone can enjoy, regardless of their design background. You can start with simple designs and gradually experiment with more intricate layouts as you gain confidence.
- What paper quality is best for personalized stationery?
The ideal paper for personalized stationery is typically a high-quality, thick paper that feels substantial to the touch. Look for options like cardstock or specialty paper that can withstand printing and embellishments without warping or tearing.
- Is it necessary to use a professional printing service for my stationery?
While professional printing services can offer high-quality results, you can also achieve great outcomes by printing your stationery at home using a good quality printer. It ultimately depends on your preferences and the level of customization you desire.
- How can I store my personalized stationery to keep it in good condition?
To preserve the quality of your personalized stationery, store it in a cool, dry place away from direct sunlight and humidity. You can use protective sleeves or boxes to prevent damage and maintain the integrity of your designs.
- What are some unique ways to package personalized stationery for gifting?
You can add a special touch to your personalized stationery gifts by packaging them in decorative boxes, tying them with ribbons, or placing them in custom-designed envelopes. Consider adding a handwritten note or a small gift alongside the stationery for a memorable presentation.