How to Create a DIY Smart Mirror
A DIY smart mirror is a fascinating project that seamlessly merges technology with home decor, creating a unique and functional piece for your living space. Imagine having a mirror that not only reflects your image but also displays useful information and interacts with you. In this article, we will walk you through the exciting journey of creating your very own smart mirror from scratch, adding a touch of modern innovation to your home.

Materials Needed
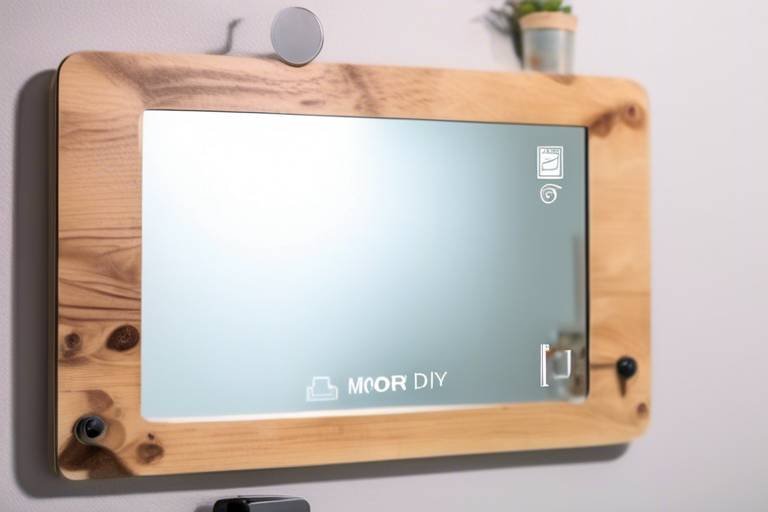
When embarking on the exciting journey of creating your very own DIY smart mirror, it's essential to gather all the necessary materials to ensure a smooth and successful project. The key components you will need include a high-quality two-way mirror, a suitable monitor, a Raspberry Pi microcomputer, and a set of various tools to aid in the assembly process.
Let's start with the star of the show, the two-way mirror. This specialized mirror allows light to pass through from one side while reflecting light on the other, creating the illusion of a mirror when the monitor is turned off. It's crucial to invest in a good quality two-way mirror to achieve the desired effect for your smart mirror.
Next up is the monitor, which will serve as the display for your smart mirror. Choose a monitor that fits well behind the two-way mirror and offers clear and crisp visuals. The size of the monitor will depend on your personal preference and the intended placement of the smart mirror in your home.
The Raspberry Pi, a versatile and affordable microcomputer, will act as the brain of your smart mirror. This tiny yet powerful device will run the necessary software to bring your mirror to life. Make sure to select the appropriate model of Raspberry Pi based on the features you wish to incorporate into your smart mirror.
Additionally, gather a set of tools such as a screwdriver, screws, a tape measure, and any other equipment required for mounting and assembling the hardware components of your smart mirror. Having the right tools at your disposal will make the construction process much more manageable and enjoyable.

Setting Up the Hardware
A DIY smart mirror is a fun and useful project that combines technology with home decor. This article will guide you through the process of creating your own smart mirror at home.
To start your DIY smart mirror project, you will need specific materials such as a two-way mirror, a monitor, a Raspberry Pi, and various tools.
Setting up the hardware for your DIY smart mirror is a crucial step in the process. This involves assembling the necessary components to bring your mirror to life. You will need to mount the monitor behind the two-way mirror to create the reflective display. Ensure that the monitor is securely attached to avoid any mishaps. Connecting the Raspberry Pi is also essential, as it serves as the brain of your smart mirror, controlling its functions and displaying information.
If you are new to working with hardware, don't worry! There are plenty of online resources and tutorials available to assist you in setting up the hardware components correctly. Take your time to follow the instructions carefully and double-check your connections to avoid any issues down the line.
Consider creating a dedicated workspace for assembling the hardware to keep all the components organized and easily accessible. Having a clean and clutter-free environment will make the setup process smoother and more enjoyable.
Remember, the hardware setup is the foundation of your smart mirror project, so investing time and effort into this stage will ensure a successful outcome.
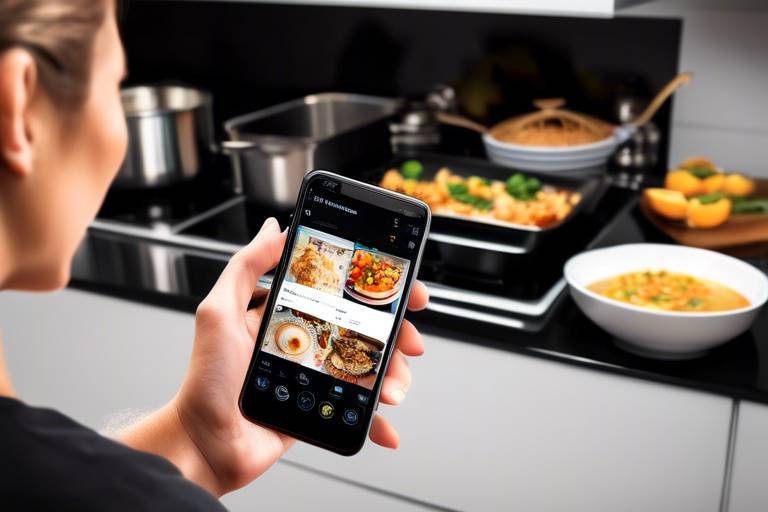
Discover the software programs and applications needed to make your smart mirror functional, such as MagicMirror² and other customization options.
Explore ways to customize the display of your smart mirror, including adding widgets, weather information, calendars, news feeds, and more.
Learn how to integrate smart features into your mirror, such as voice control, motion sensors, and other smart home devices for added functionality.
Get tips on how to securely mount your smart mirror on the wall or place it on a stand for optimal viewing and aesthetic appeal in your home.
Understand the importance of calibrating your smart mirror for optimal performance and how to test its functionality before regular use.
Find solutions to common issues that may arise with your smart mirror and learn how to maintain it to ensure long-lasting functionality and enjoyment.

Installing the Software
A DIY smart mirror is a fun and useful project that combines technology with home decor. This article will guide you through the process of creating your own smart mirror at home.
To start your DIY smart mirror project, you will need specific materials such as a two-way mirror, a monitor, a Raspberry Pi, and various tools.
Learn how to assemble the hardware components of your smart mirror, including mounting the monitor behind the two-way mirror and connecting the Raspberry Pi.
When it comes to installing the software for your smart mirror, you will need to incorporate programs and applications that bring life to the mirror's functionality. One popular choice is MagicMirror², a versatile platform that allows for customization and integration of various modules. These modules can range from displaying the weather forecast and news updates to personal calendars and to-do lists. By installing and configuring these software components, you can tailor your smart mirror to suit your preferences and needs.
Explore ways to customize the display of your smart mirror, including adding widgets, weather information, calendars, news feeds, and more.
Learn how to integrate smart features into your mirror, such as voice control, motion sensors, and other smart home devices for added functionality.
Get tips on how to securely mount your smart mirror on the wall or place it on a stand for optimal viewing and aesthetic appeal in your home.
Understand the importance of calibrating your smart mirror for optimal performance and how to test its functionality before regular use.
Find solutions to common issues that may arise with your smart mirror and learn how to maintain it to ensure long-lasting functionality and enjoyment.

Customizing the Display
Customizing the display of your DIY smart mirror is where you can truly make it your own. By adding various widgets and information, you can tailor the mirror to suit your needs and preferences. One popular customization option is to include a weather widget that displays the current weather conditions and forecast for your location. This not only adds a practical element to your mirror but also enhances its visual appeal.
In addition to the weather widget, you can also integrate a calendar feature that shows your upcoming events and appointments. This can be especially handy for keeping track of your schedule at a glance. Furthermore, adding a news feed to your smart mirror allows you to stay updated on the latest headlines and trends while getting ready in the morning.
Another way to customize your smart mirror is by incorporating personal touches such as inspirational quotes or daily affirmations. By displaying motivational messages, you can start your day on a positive note and stay motivated throughout. Moreover, you can include a customizable background to match your home decor or mood, creating a seamless blend between technology and aesthetics.
For a more interactive experience, consider adding touch screen functionality to your smart mirror. This allows you to interact with the display directly, making it easier to access information and navigate through different widgets. Additionally, you can experiment with different layouts and designs to find the perfect configuration that suits your style and preferences.

Integrating Smart Features
Integrating smart features into your DIY smart mirror can take its functionality to the next level. Imagine being able to control your mirror with just your voice or having it automatically adjust its display based on the time of day. These smart features not only enhance the user experience but also showcase the power of technology in everyday objects.
One key smart feature to consider is voice control. By integrating a voice assistant like Amazon Alexa or Google Assistant, you can interact with your smart mirror hands-free. Whether you want to check the weather, play music, or set reminders, voice control adds a whole new level of convenience to your mirror.
Another smart feature to explore is motion sensors. These sensors can detect when someone is in front of the mirror and activate certain functions, such as displaying the time or showing notifications. It's like having a mirror that comes to life when you approach it, adding an element of surprise and delight to your daily routine.
Additionally, you can connect your smart mirror to other smart home devices, creating a seamless ecosystem of interconnected technology. Imagine your mirror displaying your daily schedule from your smart calendar or showing live feeds from your security cameras. The possibilities are endless when it comes to integrating smart features into your DIY smart mirror.

Mounting and Placement
When it comes to mounting and placing your DIY smart mirror, there are a few key considerations to keep in mind. First and foremost, you'll want to ensure that the mirror is securely mounted on the wall or placed on a stand to prevent any accidents or damage. The weight and size of your mirror will determine the type of mounting hardware or stand you'll need, so be sure to choose a sturdy and appropriate option.
Additionally, think about the location where you want to install your smart mirror. Consider factors such as lighting, visibility, and accessibility. Placing the mirror in a well-lit area will not only enhance its display but also make it easier to use. Avoid placing it in direct sunlight to prevent glare and interference with the screen visibility.
If you opt for wall mounting, make sure to use the right tools and follow the installation instructions carefully. It's essential to find the studs in the wall to securely anchor the mirror and prevent it from falling. Using a level during installation will help ensure that your mirror is straight and aligned correctly.
For those choosing to place the smart mirror on a stand, select a stable and stylish stand that complements your home decor. A stand with adjustable height or tilt features can offer flexibility in positioning the mirror for comfortable viewing angles. Keep in mind the overall aesthetics of the room when deciding on the placement to create a cohesive look.
Remember that the placement of your smart mirror can significantly impact its functionality and visual appeal. Experiment with different locations and setups to find the perfect spot that enhances both the technological features and the overall design of your living space.

Calibrating and Testing
Calibrating and testing your DIY smart mirror is a crucial step to ensure its optimal performance and functionality. Calibration involves adjusting the settings and parameters of the mirror to achieve the best display quality. Testing, on the other hand, allows you to verify that all features are working correctly before integrating it into your daily routine.
When it comes to calibrating your smart mirror, you may need to fine-tune the brightness, contrast, and color settings to achieve the desired visual output. This process can be done using the settings on your monitor or through the software interface, depending on the customization options available.
Testing the smart mirror involves checking each feature individually to confirm that they are working as intended. This includes testing the display of widgets, weather updates, calendar synchronization, news feeds, and any other customizations you have added to the mirror.
Additionally, it is essential to test the integration of smart features, such as voice control and motion sensors, to ensure seamless operation. By testing these features, you can identify any issues or malfunctions early on and address them promptly.
After calibrating and testing your smart mirror, take the time to assess its overall performance and make any necessary adjustments. Regular testing and calibration can help maintain the mirror's functionality and prevent potential issues from arising in the future.

Troubleshooting and Maintenance
When it comes to troubleshooting and maintenance of your DIY smart mirror, it's essential to be prepared for any potential issues that may arise. One common problem that users encounter is the display not functioning correctly. This could be due to a loose connection between the monitor and Raspberry Pi, or a software glitch that needs to be addressed.
One way to troubleshoot display issues is to check all the connections and ensure everything is securely in place. If the problem persists, you may need to reboot the Raspberry Pi and recalibrate the smart mirror software to resolve any compatibility issues.
Another aspect of maintenance is keeping your smart mirror clean and free of dust and smudges. Regularly wipe the two-way mirror and monitor with a soft, lint-free cloth to maintain optimal visibility and performance. Avoid using harsh chemicals that could damage the mirror or monitor surface.
Additionally, it's important to stay updated with software upgrades and patches to ensure your smart mirror operates smoothly. Check for updates for MagicMirror² and other applications you have installed, as new versions may offer improved features and bug fixes.
For more advanced troubleshooting or maintenance tasks, refer to online forums and communities dedicated to smart mirror projects. These resources can provide valuable insights and solutions to complex issues that may arise during the usage of your DIY smart mirror.
Frequently Asked Questions
- Can I use any mirror for a DIY smart mirror project?
It is recommended to use a two-way mirror for the best results in a smart mirror project. Two-way mirrors allow the display to show through while still acting as a reflective surface when the display is off.
- Do I need programming experience to set up the software for a smart mirror?
While some basic knowledge of programming can be helpful, many software options for smart mirrors come with user-friendly interfaces that do not require extensive programming skills. Following installation guides and tutorials can help you set up the software without advanced programming knowledge.
- Can I customize the widgets and information displayed on the smart mirror?
Yes, you can customize the display of your smart mirror by adding various widgets, such as weather forecasts, calendars, news feeds, and more. Most smart mirror software platforms offer customization options to tailor the information displayed to your preferences.
- Is it possible to control the smart mirror with voice commands?
Integrating voice control features into a smart mirror is achievable by using compatible software and devices. Voice control can enhance the functionality of your smart mirror, allowing you to interact with it hands-free.
- What should I do if my smart mirror encounters technical issues?
If you encounter technical issues with your smart mirror, troubleshooting steps can help identify and resolve common problems. Checking connections, updating software, and seeking online support forums are some ways to address technical issues.