How to Build a DIY Swing Bench for Your Garden
Are you looking to add a touch of charm and relaxation to your garden? Building a DIY swing bench might be the perfect project for you! Not only does it provide a cozy spot to unwind outdoors, but it also adds a functional and stylish element to your outdoor space. Let's dive into the step-by-step guide on how to construct your very own swing bench for your garden.

Gathering Materials
When embarking on the journey of building your very own swing bench for the garden, the first crucial step is gathering the necessary materials. Selecting the right materials is paramount to ensure the durability, safety, and longevity of your swing bench project. Quality wood is essential for the frame and seat to withstand outdoor conditions, while sturdy chains or ropes are needed for hanging the swing securely. Additionally, screws, bolts, and other hardware must be of high quality to guarantee the stability of the structure.
Consider the importance of quality materials in every aspect of your swing bench construction. Using subpar materials may lead to premature wear and tear, compromising the safety and overall enjoyment of your swing bench. Invest in durable wood that can withstand weather exposure and weight capacity requirements. Opting for reliable chains or ropes will ensure a smooth swinging experience without the risk of breakage or accidents.

Design Planning
When it comes to for your DIY swing bench project, you're entering the creative realm where your vision takes shape. Imagine this stage as the artist's canvas, where you get to sketch out the blueprint of your swing bench masterpiece. It's not just about functionality but also about creating a piece that reflects your style and personality.
Consider the dimensions of your swing bench carefully. Will it be a cozy two-seater or a larger bench for gatherings? Think about the space available in your garden and how the swing bench will fit into the overall layout. You want it to be a focal point that enhances the beauty of your outdoor space.
Moreover, think about the aesthetic appeal of your swing bench. Do you prefer a rustic look with natural wood finishes, or maybe a more modern design with sleek lines? Your swing bench should complement the existing décor of your garden while also standing out as a charming addition.
Customization is key in . This is your opportunity to add personal touches that make the swing bench uniquely yours. Whether it's intricate carvings, a pop of color with vibrant cushions, or even built-in cup holders for your favorite beverage, let your creativity shine through in the design.

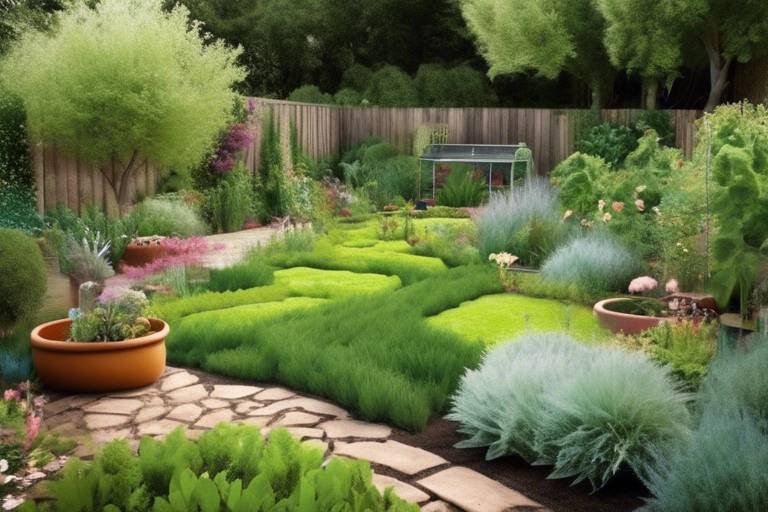
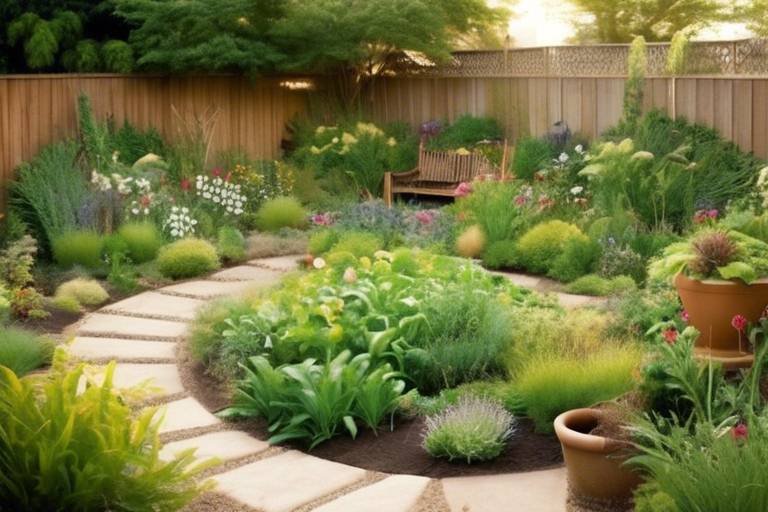
Choosing the Right Location
When it comes to choosing the right location for your DIY swing bench, several factors play a crucial role in creating a comfortable and inviting outdoor space. First and foremost, consider the amount of shade available in different areas of your garden. Placing the swing bench in a spot that offers a balance of sunlight and shade can ensure that you can enjoy swinging at any time of the day without being exposed to harsh sunlight.
Additionally, evaluate the available space in your garden to determine the best location for the swing bench. Ensure that there is enough room around the bench for a smooth swinging motion and easy access. Avoid placing the bench too close to other structures or plants to allow for unrestricted movement and a sense of openness.
Accessibility is another key aspect to consider when selecting the location for your swing bench. Choose a spot that is easily accessible from different areas of your garden, allowing you to reach the bench without any obstacles in the way. This accessibility ensures that you can seamlessly integrate the swing bench into your outdoor living space.
Moreover, think about the overall ambiance and aesthetics of the chosen location. The swing bench should complement the surrounding environment and enhance the beauty of your garden. Consider how the bench will look against the backdrop of your plants, flowers, or other garden features to create a harmonious and visually appealing setting.

Preparing the Wood
When it comes to preparing the wood for your DIY swing bench project, attention to detail and proper treatment are key to achieving a professional and polished finish. Before assembling the swing bench, it is essential to cut, sand, and treat the wood to ensure durability and protection against the elements.
Start by selecting high-quality wood that is suitable for outdoor use and can withstand varying weather conditions. Popular choices include cedar, teak, or pressure-treated lumber for their durability and resistance to rot and decay. Ensure that the wood is smooth and free of splinters to prevent any discomfort while using the swing bench.
Cutting the wood to the correct dimensions according to your design plan is crucial for a precise fit and overall aesthetic appeal. Use a saw to carefully trim the wood pieces to the desired length, ensuring straight and clean cuts for a professional look.
After cutting, sand the wood thoroughly to remove any rough edges or imperfections. Start with a coarse grit sandpaper to smooth out larger bumps and then progress to a finer grit for a silky finish. Pay special attention to rounded edges for a comfortable and safe user experience.
Once the wood is cut and sanded, it is important to treat the surfaces with a protective sealant or stain to enhance its longevity and resistance to moisture. Choose a weather-resistant finish that is suitable for outdoor applications and provides UV protection to prevent fading and discoloration over time.
Consider applying a wood preservative before adding any paint or stain to further protect the wood from insects and fungal decay. Allow the preservative to dry completely before proceeding with the finishing touches to ensure maximum effectiveness.
By taking the time to properly prepare the wood for your swing bench project, you not only ensure a professional and polished appearance but also increase the lifespan of your outdoor furniture. Investing in quality materials and meticulous preparation will result in a swing bench that not only looks great but also stands the test of time in your garden.

Assembling the Frame
When it comes to of your DIY swing bench, precision and attention to detail are key. This stage of the project involves bringing together the prepared wooden components to create a sturdy and stable structure that will support the swinging motion. By following the design plan and securing the frame with screws and bolts, you can ensure the safety and durability of your swing bench.
Before starting the assembly process, it is important to lay out all the wooden pieces according to the design plan. This step will help you visualize how the frame will come together and ensure that you have all the necessary components ready for assembly. Organizing the pieces in the correct order will streamline the process and prevent any confusion during construction.
Once you have arranged the wooden elements, begin by connecting the main support beams to form the basic frame of the swing bench. Use a level to ensure that the frame is straight and even, making adjustments as needed to achieve a balanced structure. Secure the beams together with screws, ensuring a tight fit that will prevent any wobbling or instability during use.
After the main frame is assembled, it's time to attach the seat and backrest components. Position these pieces according to the design plan, ensuring proper alignment and spacing for a comfortable seating area. Secure the seat and backrest to the frame using screws or bolts, making sure that they are firmly attached to support the weight of the swing bench users.
As you progress with the assembly, periodically check the stability and strength of the frame to identify any potential weak points or areas that may require reinforcement. Testing the frame by applying pressure and gentle rocking motions can help you assess its durability and make any necessary adjustments before completing the assembly process.
Once the frame is fully assembled and secure, take a moment to admire your handiwork. The frame serves as the backbone of your swing bench, providing the necessary support for a relaxing and enjoyable swinging experience. With attention to detail and careful construction, you can create a frame that not only looks great but also ensures the safety and comfort of anyone using the swing bench.

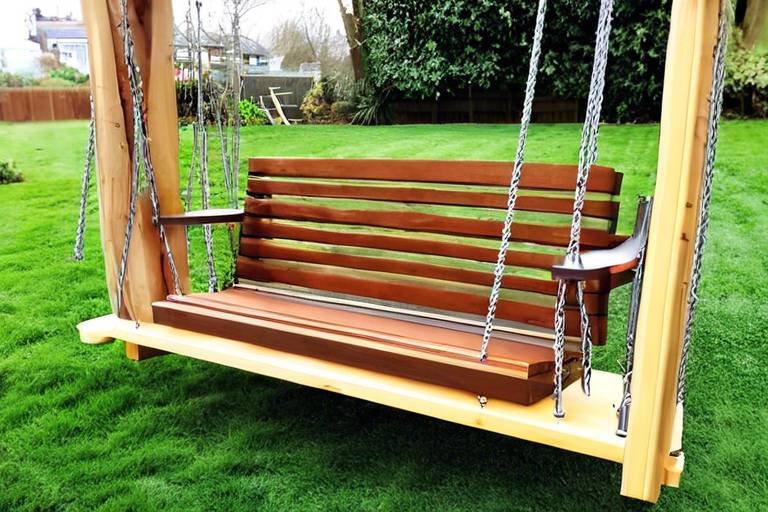
Installing the Swing
When it comes to installing the swing on your newly built swing bench, attention to detail is key to ensure a smooth and enjoyable swinging experience. Begin by carefully attaching the chains or ropes to the designated hooks or eye bolts on the frame of the swing bench. Make sure the chains are securely fastened and properly aligned to maintain balance and stability during use.
Testing the swing is crucial before fully committing to its installation. Sit on the swing bench and gently sway back and forth to assess its stability and comfort. Adjust the chains or ropes as needed to achieve the desired height and swinging motion. It's essential to ensure that the swing is securely attached to the frame to prevent any accidents or mishaps.
Once you are satisfied with the installation and testing of the swing, take a moment to admire your handiwork. The sight of a beautifully crafted swing bench in your garden is not only visually appealing but also offers a peaceful retreat for relaxation and contemplation. The gentle sway of the swing can transport you to a state of tranquility amidst the natural surroundings of your garden.

Adding Finishing Touches
Adding the finishing touches to your DIY swing bench is the final step in completing your project and enhancing both its appearance and functionality. After assembling the frame and installing the swing, it's time to give your swing bench that extra flair and comfort that will make it a standout feature in your garden.
One essential finishing touch is applying a protective finish to the wood. This finish will not only add a layer of weather resistance but also bring out the natural beauty of the wood. Consider using a varnish or outdoor wood sealant to protect the swing bench from the elements and prolong its lifespan.
Additionally, you can choose to paint the swing bench to match your garden's color scheme or add a pop of color for a playful touch. Make sure to use outdoor paint that is suitable for wooden surfaces and can withstand outdoor conditions without fading or peeling.
To enhance the comfort of your swing bench, consider adding cushions or pillows. These accessories not only provide extra support while lounging on the swing but also add a cozy and inviting look to the overall design. Opt for weather-resistant cushions that can withstand outdoor use and are easy to clean.
Personalizing your swing bench with decorative elements such as hanging plants, fairy lights, or a canopy can elevate its charm and create a relaxing ambiance in your garden. These finishing touches can transform your swing bench into a cozy retreat where you can unwind and enjoy the beauty of your outdoor space.

Enjoying Your New Swing Bench
After all the hard work and dedication put into building your very own swing bench, it's finally time to sit back, relax, and enjoy the fruits of your labor. Picture yourself swaying gently in the breeze, surrounded by the beauty of your garden and the soothing sounds of nature. Your new swing bench offers a perfect retreat from the hustle and bustle of daily life, providing a peaceful sanctuary right in your backyard.
To enhance your swinging experience, consider adding some cozy cushions or pillows to your bench. These soft additions not only increase comfort but also inject a touch of style and personality into your outdoor space. Imagine sinking into a plush cushion as you swing, feeling completely at ease and content. It's the little details that can truly elevate your relaxation time on the swing bench.
As you spend more time on your swing bench, you'll start creating wonderful memories with your loved ones. Whether it's enjoying a leisurely afternoon chat with a friend or reading a book under the shade of a tree, your swing bench becomes a focal point for bonding and relaxation. The simple act of swinging back and forth can bring joy and laughter, making your garden a place of warmth and connection.
Don't forget to take a moment to appreciate the craftsmanship and effort that went into building your swing bench. Each screw, each piece of wood, and each swing is a testament to your creativity and skill. Bask in the satisfaction of seeing your vision come to life and knowing that you've created something truly special for yourself and your loved ones to enjoy.
Frequently Asked Questions
- What type of wood is best for building a swing bench?
The best type of wood for a swing bench is durable and weather-resistant, such as cedar, teak, or redwood. These woods are known for their ability to withstand outdoor elements and provide long-lasting quality for your swing bench project.
- Do I need any special tools to build a swing bench?
Yes, you will need basic woodworking tools such as a saw, drill, screwdriver, and measuring tape. Additionally, having a sander for smoothing out the wood and a level for ensuring even placement are recommended for a successful construction process.
- How high should I hang the swing bench chains?
The ideal height for hanging swing bench chains is typically around 18-24 inches from the ground. This height allows for comfortable seating and proper swinging motion without the bench being too low or too high off the ground.
- Can I customize the design of my swing bench?
Absolutely! You can customize the design of your swing bench to match your personal style and garden décor. Consider adding decorative elements, engraving, or painting the wood to create a unique and personalized swing bench that reflects your taste.
- How can I protect my swing bench from the weather?
To protect your swing bench from the elements, consider applying a weather-resistant finish or sealant to the wood. This will help prevent moisture damage, UV exposure, and rot, ensuring that your swing bench remains in good condition for years to come.