How to Make Natural Soap at Home
Creating your own natural soap at home can be a rewarding and fulfilling experience. Not only do you have control over the ingredients you use, but you also get to customize your soap to suit your preferences. Whether you're looking to create a luxurious bar for yourself or craft thoughtful gifts for loved ones, making natural soap is a fun and creative process.
When embarking on this journey, the first step is to gather all the necessary ingredients. High-quality oils, lye, water, and essential oils are the building blocks of your soap recipe. It's essential to choose ingredients that are safe for skin contact and to follow proper safety measures when working with lye, a caustic substance used in soap making.
Next, prepare your equipment to ensure a smooth soap-making process. A digital scale will help you accurately measure ingredients, while heat-resistant containers and molds are essential for mixing and shaping the soap. Having all your tools ready before you start will make the process more efficient.
Once you have everything set up, it's time to mix the ingredients together. Combining oils, lye, and water initiates the saponification process, turning these components into soap. Adding essential oils and other additives like herbs or clays can enhance the fragrance and properties of your soap, creating a truly unique product.
For those looking to add a pop of color or texture to their soap, natural options like clays, herbs, and botanicals offer a range of possibilities. These ingredients not only provide aesthetic appeal but also offer additional benefits such as exfoliation or soothing properties for the skin.
After mixing and adding any desired elements, pour the soap mixture into molds to shape it. Allowing the soap to cure over several weeks is crucial for the saponification process to complete and for the soap to harden properly. Patience is key during this phase as the soap develops its final texture and properties.
Once the soap has cured, it's time to cut and shape it into bars. This step allows you to create individual pieces of soap in your preferred size and shape. Allowing the soap to further cure after cutting improves its hardness and longevity, ensuring a long-lasting bar for use.
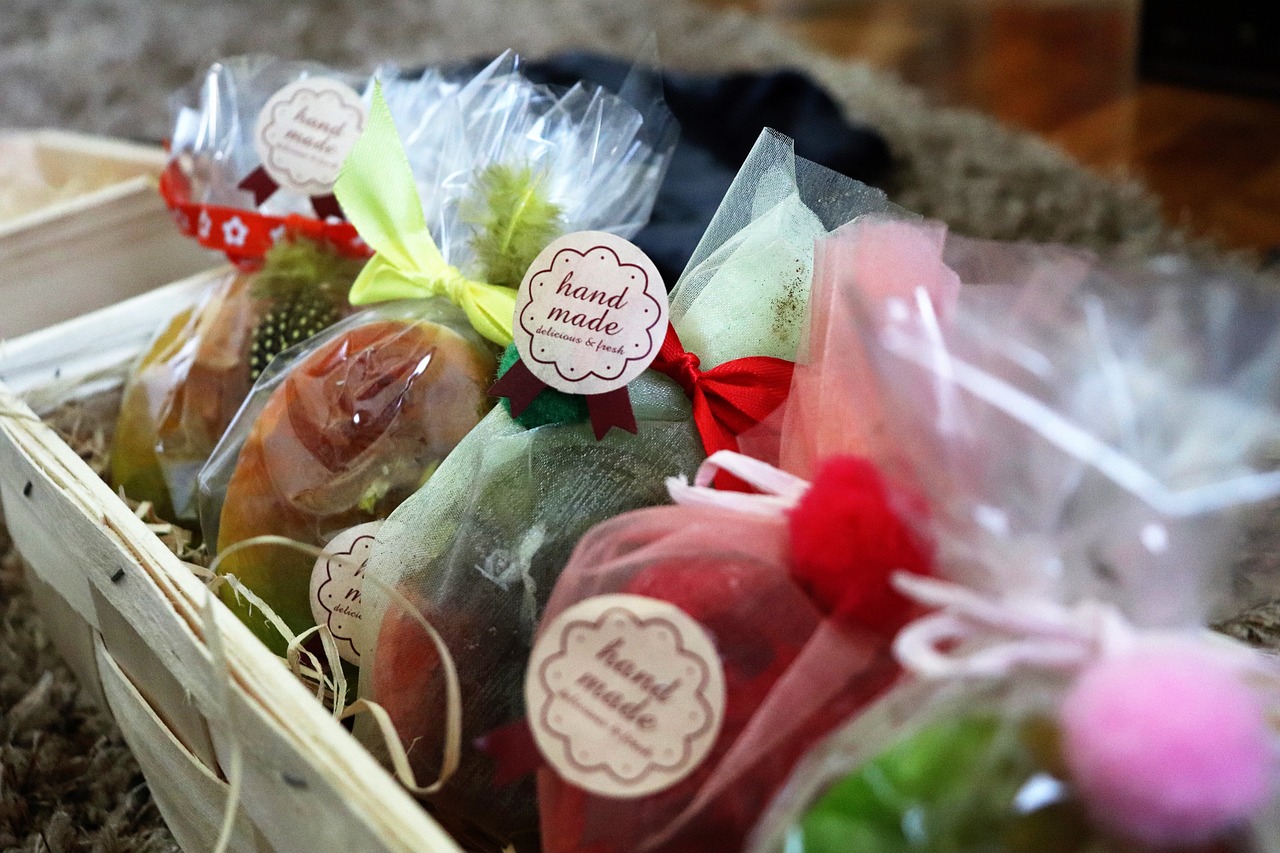
Personalizing your homemade natural soap with custom labels and packaging adds a special touch to your creation. Whether you're keeping the soap for yourself or giving it as a gift, thoughtful packaging enhances the overall presentation and makes the soap truly unique.
Finally, enjoy the fruits of your labor by indulging in a luxurious bathing experience with your homemade natural soap. Revel in the satisfaction of creating something with your own hands, tailored to your preferences, and free of harsh chemicals. Your skin will thank you for the care and attention you put into crafting a soap that's both nourishing and eco-friendly.
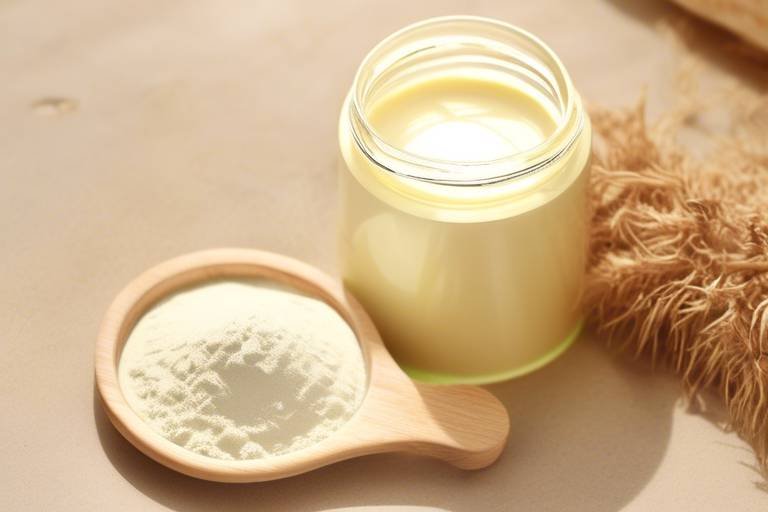
Gathering Ingredients
When it comes to making natural soap at home, the first crucial step is gathering the right ingredients. Your soap's quality and properties will heavily depend on the oils, lye, water, and essential oils you select. It's essential to opt for high-quality ingredients to ensure a luxurious and eco-friendly skincare routine. Additionally, safety measures are paramount, especially when working with lye, as it is a caustic substance that requires careful handling.
Choosing the oils for your soap recipe is a critical decision. Different oils bring unique properties to the soap, such as moisturizing, lathering, or conditioning. Common oils used in soap making include coconut oil, olive oil, and shea butter. Each oil contributes to the soap's overall performance and feel on the skin. Furthermore, selecting the right essential oils is key to adding fragrance and potential therapeutic benefits to your homemade soap.
Another important ingredient to consider is lye, also known as sodium hydroxide. Lye is a necessary component in soap making as it reacts with oils to initiate the saponification process, turning them into soap. It's vital to handle lye with care, wearing protective gear such as gloves and goggles, and ensuring proper ventilation during the mixing process.
Water is the next essential ingredient in soap making. The amount of water used in the recipe affects the soap's texture and hardness. Distilled water is typically recommended to avoid impurities that could interfere with the soap's chemical reaction. Properly measuring and incorporating water is crucial for the soap to set correctly.
Once you have gathered all your ingredients, it's time to start the soap-making process. Ensuring that you have high-quality oils, lye, water, and essential oils will set the foundation for creating a beautiful and nourishing natural soap that is tailored to your preferences and skin's needs.

Equipment Preparation
When it comes to making natural soap at home, equipment preparation plays a crucial role in ensuring a successful and safe soap-making process. Before diving into the world of homemade soap, it's essential to gather all the necessary tools and equipment to streamline your experience and create high-quality bars.
One of the first items you'll need is a reliable digital scale to accurately measure your ingredients. Precision is key in soap making, as even slight variations can affect the final product. Investing in a quality scale will help you achieve consistent results with each batch.
Heat-resistant containers are another essential component of equipment preparation. These containers will be used to mix your oils, lye, and water safely. Opt for containers that can withstand high temperatures to prevent any mishaps during the soap-making process.
Additionally, having molds ready for shaping your soap is crucial. Whether you prefer traditional rectangular molds or silicone molds for intricate designs, ensure they are clean and ready for use. Proper molds will help give your homemade soap a professional finish.
Lastly, don't forget about safety gear. When working with lye, protective equipment such as gloves, goggles, and a mask are non-negotiable. Prioritize safety at all times to prevent any accidents and ensure a smooth soap-making experience.
By taking the time to prepare your equipment properly, you set yourself up for success in creating beautiful and luxurious natural soaps at home. Remember, the right tools not only make the process easier but also contribute to the overall quality of your final product.
Mixing the Ingredients
When it comes to for your homemade natural soap, precision and care are key. This step in the soap-making process involves combining the oils, lye, and water to create a soap base that will form the foundation of your luxurious skincare product. It's essential to follow the recipe closely and take necessary safety precautions when working with lye, a caustic substance that is a crucial component in soap making.
Before you begin mixing, ensure that you have all your ingredients measured out accurately using a reliable digital scale. This step is crucial for the success of your soap recipe, as even slight variations in measurements can impact the final product's quality and consistency. Additionally, make sure to use heat-resistant containers to mix the ingredients, as lye can generate heat when mixed with water.
Once you have your oils, lye, and water measured and ready, it's time to combine them to initiate the saponification process. This chemical reaction transforms the oils and lye into soap, creating a cleansing and nourishing product for your skin. Stir the mixture carefully but thoroughly, ensuring that all ingredients are well incorporated.
After the soap base has reached a certain consistency, you can add essential oils and other additives to enhance the fragrance and properties of your soap. Essential oils not only provide a delightful scent but also offer various benefits for the skin, such as moisturizing, soothing, or invigorating properties. Experiment with different essential oil blends to create a unique and personalized soap experience.
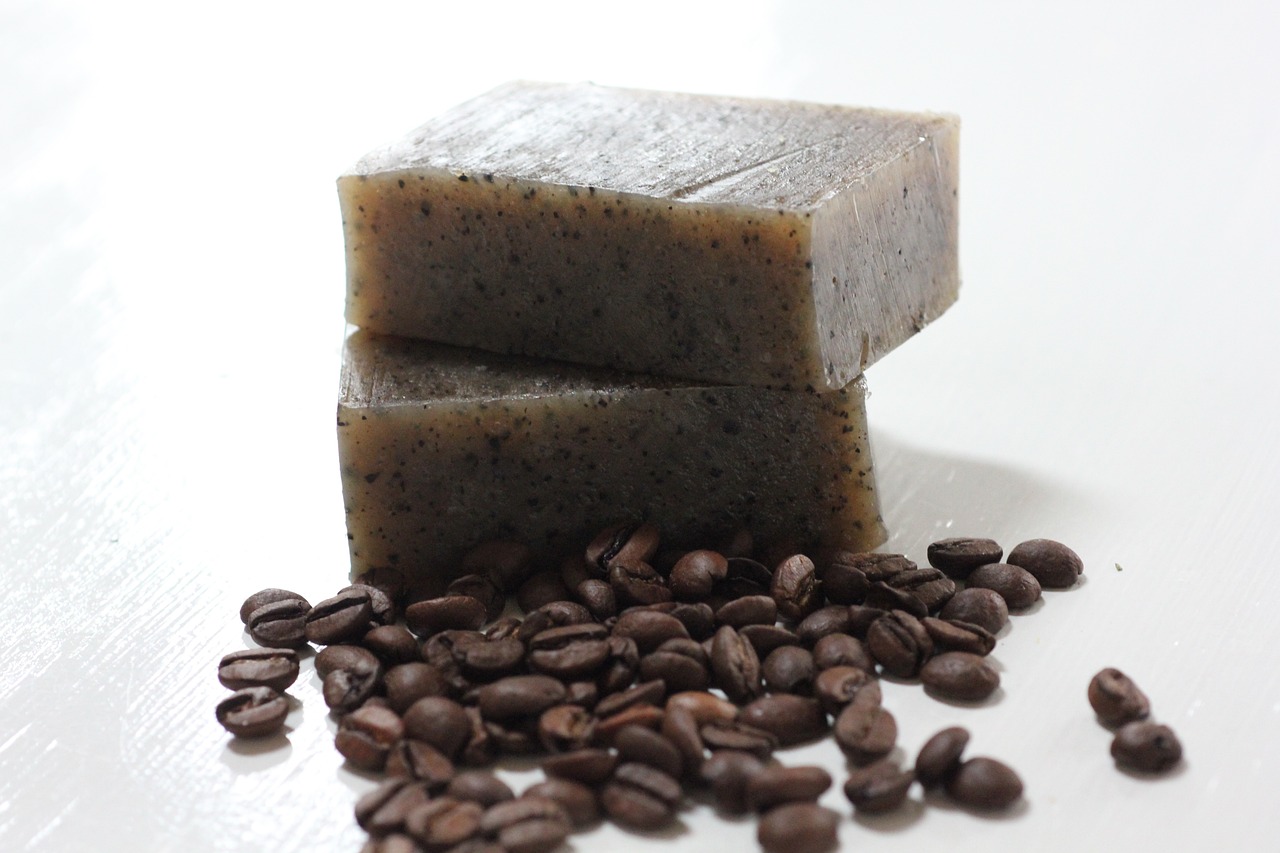
In addition to essential oils, you can also consider incorporating natural ingredients like herbs, clays, or botanicals to add color, texture, and additional skincare benefits to your soap bars. These natural additives can provide exfoliation, moisturization, or other therapeutic effects, making your homemade soap truly special and tailored to your preferences.
Once you have mixed in all the ingredients thoroughly, pour the soap mixture into molds to give it the desired shape and size. Allow the soap to set and harden in the molds before proceeding to the curing process. Curing is essential for ensuring that the soap is gentle on the skin and will last longer, so be patient and give your soap the time it needs to mature.
As you master the art of mixing the ingredients for your homemade natural soap, you'll experience the joy of creating a product that is not only luxurious but also free of harsh chemicals and tailored to your unique preferences. The process of mixing oils, lye, water, and additives to craft a beautiful soap bar is a rewarding journey that allows you to indulge in the creativity and satisfaction of handmade skincare.
Adding Color and Texture
When it comes to creating homemade natural soap, adding color and texture is a fun and creative step that allows you to customize your soap bars according to your preferences. Natural options such as clays, herbs, and botanicals not only add visual appeal but also offer various benefits for the skin.
Clays like kaolin, bentonite, or French green clay can be incorporated into your soap recipe to give it color as well as provide gentle exfoliation. These clays are known for their detoxifying properties and can help draw out impurities from the skin, leaving it feeling refreshed and rejuvenated.
Herbs and botanicals are another fantastic way to add color, texture, and unique properties to your homemade soap. Ingredients like dried lavender buds, calendula petals, or chamomile flowers not only enhance the visual appeal of the soap but also offer soothing and calming benefits for the skin.
Additionally, you can experiment with natural colorants such as spirulina powder, turmeric, or cocoa powder to achieve vibrant hues in your soap bars. These natural colorants are not only safe for the skin but also environmentally friendly, making them a great choice for eco-conscious soap makers.
Remember to consider the overall aesthetic you want to achieve with your soap bars and choose color and texture additives that complement the essential oils and base oils used in your recipe. By adding color and texture thoughtfully, you can create visually stunning and skin-loving natural soaps that elevate your bathing experience.
Molding and Curing
When it comes to your homemade natural soap, this stage is crucial in ensuring that your soap bars are of the highest quality and provide a luxurious bathing experience. After mixing your soap ingredients and adding any desired color or texture enhancements, it's time to pour the soap mixture into molds. These molds can range from simple rectangular shapes to intricate designs, depending on your preference.
Once the soap mixture is poured into the molds, it needs to cure over several weeks. Curing is a process where the soap hardens and dries out, allowing it to become a solid bar that is gentle on the skin. During this time, it's essential to store the molds in a cool, dry place away from direct sunlight to facilitate the curing process.
As the soap cures, it undergoes a chemical reaction known as saponification, where the oils and lye transform into soap. This process is what gives the soap its cleansing properties and ensures that it is safe to use on the skin. Curing also allows the soap to develop a milder pH level, making it suitable for all skin types.
After the curing period is complete, it's time to unmold the soap bars. Carefully remove the hardened soap from the molds and place them on a drying rack to further air out and solidify. This additional curing time helps improve the hardness and longevity of the soap, ensuring that it lasts through multiple uses without becoming mushy.
Once the soap bars have fully cured and hardened, you can proceed to cut and shape them to your desired size and design. Whether you prefer large bars or smaller, more intricate shapes, cutting the soap allows you to customize your creations and make them unique to your preferences. Remember to use a sharp knife or soap cutter for clean, precise cuts.
Finally, after molding, curing, cutting, and shaping your homemade natural soap, it's time to package and label them. Design personalized labels that reflect the ingredients and scents used in your soap, adding a touch of creativity to your final product. Whether you're keeping the soaps for personal use or gifting them to loved ones, thoughtful packaging adds an extra special touch to your handmade creations.
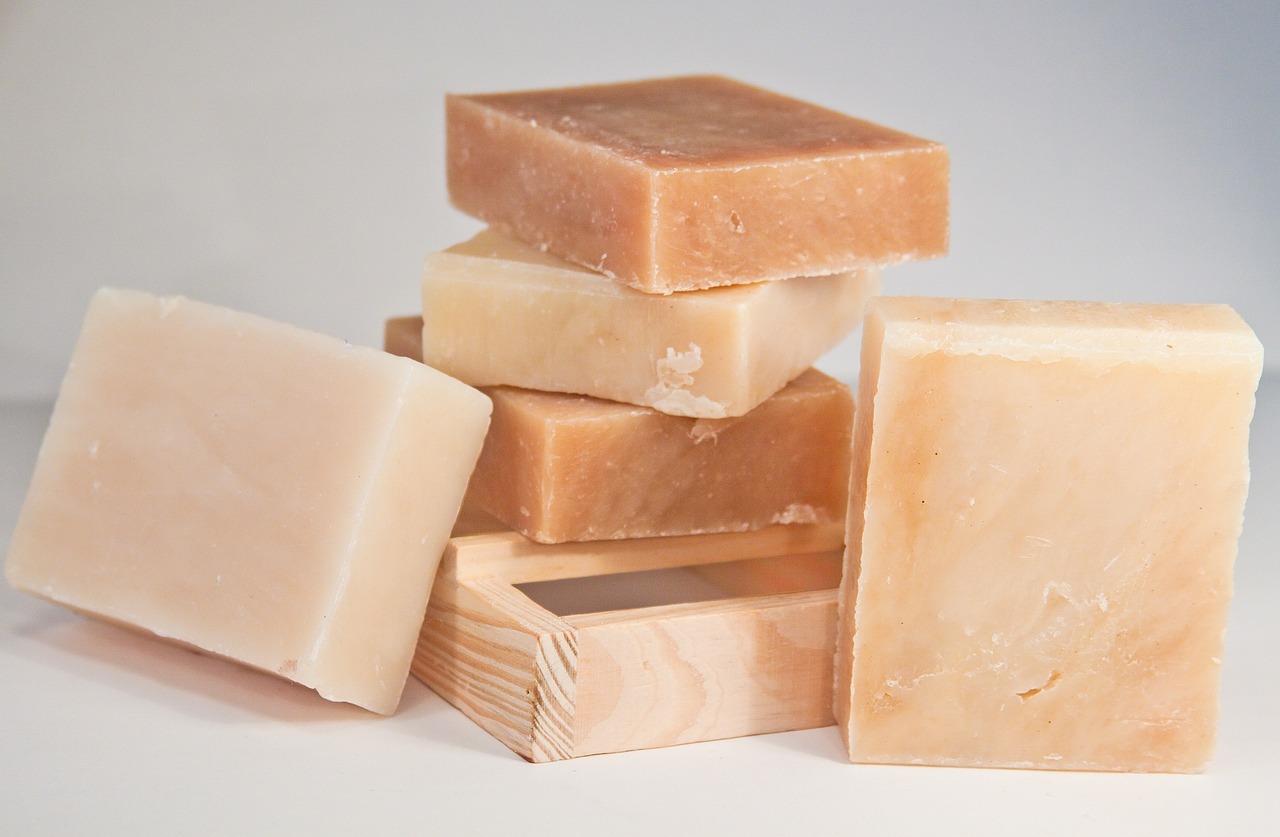
Cutting and Shaping
When it comes to the final steps of creating your own natural soap at home, the process of cutting and shaping plays a crucial role in achieving the desired look and feel of your soap bars. Once your soap has fully cured and hardened, it's time to transform it into individual bars that are ready for use or gifting.
Using a sharp knife or soap cutter, carefully cut the solidified soap block into the desired shapes and sizes. Whether you prefer classic rectangular bars or more artistic shapes, this step allows you to personalize your soap creations according to your preferences.
As you slice through the soap, you may notice the beautiful patterns and textures that have formed during the curing process. Each bar is unique, showcasing the natural ingredients and additives you incorporated into the recipe. This cutting process not only defines the appearance of the soap but also enhances its overall aesthetic appeal.
After cutting, it's essential to further cure the individual soap bars to improve their hardness and longevity. Place the cut bars on a drying rack or parchment paper in a cool, dry place with good air circulation. Allowing the soap to continue curing for a few more weeks will result in a firmer, milder bar that lathers well and lasts longer during use.
Shaping your soap bars can also add a creative touch to your homemade creations. Consider using cookie cutters or specialty molds to craft unique shapes that reflect your personal style or the theme of your soap recipe. Whether you opt for simple geometric designs or intricate patterns, shaping your soap adds a fun and artistic element to the soap-making process.

Labeling and Packaging
Labeling and packaging your homemade natural soap is the final touch that adds a professional and personalized feel to your creation. When it comes to labeling, you have the opportunity to showcase your creativity and attention to detail. Consider designing labels that reflect the essence of your soap, whether it's a refreshing citrus blend or a calming lavender scent. You can include the name of your soap, a list of ingredients, and any special benefits it offers. Additionally, adding a personal touch such as a custom logo or a decorative label can make your soap stand out.
When it comes to packaging, the options are endless. You can choose from eco-friendly options like recycled paper, biodegradable cellophane bags, or reusable fabric wraps. Consider the aesthetic appeal of your packaging and how it aligns with the overall branding of your soap. Whether you prefer minimalist packaging or colorful designs, make sure it reflects the quality and uniqueness of your homemade soap.
Furthermore, packaging plays a crucial role in protecting your soap and preserving its quality. Ensure that your packaging is secure and moisture-resistant to prevent your soap from deteriorating. Proper packaging also extends the shelf life of your soap, keeping it fresh for longer periods.
Enjoying Your Creation
After all the hard work and patience put into making your own natural soap, it's finally time to enjoy the fruits of your labor. The satisfaction that comes with using a product you created from scratch is truly unmatched. As you lather up with your handmade soap, take a moment to appreciate the care and thought that went into each step of the process.
With your personalized natural soap in hand, you can revel in the knowledge that you have crafted a product tailored to your preferences. The unique combination of oils, scents, and additives chosen by you ensures a one-of-a-kind bathing experience. The absence of harsh chemicals in your homemade soap guarantees a gentle cleanse that nourishes your skin with every use.
Imagine stepping into the shower or bath, reaching for your beautifully crafted soap bar, and inhaling the delightful aroma of essential oils. As the soap lathers and glides over your skin, you can feel the luxurious texture and moisturizing properties that make your bathing routine a true indulgence.
Not only does using your homemade natural soap provide a sensory experience, but it also offers peace of mind. Knowing exactly what ingredients are in your soap gives you confidence in the purity and quality of the product. You can bathe without worries, knowing that your skin is being pampered with only the best nature has to offer.
Whether you keep your handmade soap for yourself or share it with loved ones as a thoughtful gift, the joy it brings is immeasurable. Each time you use your creation, you are reminded of the creativity and care that went into making it. So, savor the moment, enjoy the luxurious lather, and relish in the satisfaction of a job well done.
Frequently Asked Questions
- Can I use any type of oil for making natural soap?
While certain oils are more commonly used in soap making due to their properties, you can experiment with different oils to create unique blends. It's essential to research the characteristics of each oil to ensure a balanced and nourishing soap recipe.
- Is it safe to handle lye when making soap at home?
Lye, also known as sodium hydroxide, is a caustic substance that requires careful handling. It's crucial to follow safety precautions such as wearing protective gear, working in a well-ventilated area, and being cautious when mixing lye with water. Proper safety measures are key to a successful and safe soap-making process.
- How long does it take for homemade soap to cure?
The curing process for homemade soap typically ranges from 4 to 6 weeks. During this time, the soap hardens and pH levels stabilize, resulting in a milder and longer-lasting bar. Patience is key to allowing your soap to fully cure and develop its best qualities.
- Can I customize the fragrance and color of my natural soap?
Absolutely! Essential oils, botanicals, clays, and natural colorants offer a wide range of options to personalize your soap. Experiment with different combinations to create signature scents and visually appealing designs that reflect your preferences and style.
- What are the benefits of using natural homemade soap?
Natural homemade soap is free of harsh chemicals and artificial additives commonly found in commercial soaps. It offers gentle cleansing, moisturizing properties, and the ability to tailor ingredients to suit specific skin needs. Using natural soap promotes healthier skin and contributes to a more sustainable lifestyle.